Tuesday, December 30, 2008

Chocolate-Chocolate Chip Snack Cake

Despite the no-travel advisory, the hubby decided to make the 45-mile trek to work on the icy, snowy roads. To reward his bravado (stupidity?) – and to thank him for snowblowing the driveway and scooping the deck and shoveling a path for the puppies in the backyard, all while it was 8 degrees below zero with a -31 wind chill – I decided to bake him a cake in my nice warm kitchen. Yes, we both pull our fair share around here.

I’m not really a cake person, because I’m not really a frosting person. Which is why I love snack cake, sometimes called picnic cake. I’m assuming it got its various names because it’s typically moist enough that it doesn’t require frosting. So you can just pick it up and carry it around while you eat, and you can pack it fairly easily. Just guesses, mind you.

I got this recipe from a Taste of Home magazine years ago, and it's easy and fast and yummy. I should really bake it for the hubby more often. Plus, it makes an 8x8 pan, which we can easily devour before the cake goes stale. (Clarification: We devour the cake, not the pan.)

This would be a great recipe for the kiddies to assist with; they could help toss in the flour and sprinkle the cake with chocolate chips before it goes in the oven. That’s my favorite part. I excel at chocolate chip sprinkling.

Chocolate-Chocolate Chip Snack Cake
Serves 9

2 squares (1 oz. each) unsweetened chocolate
1¼ c. flour
½ tsp. baking soda
½ tsp. salt
1 egg
1 c. sugar
¾ c. cold water
1/3 c. vegetable oil
1 c. (6 oz.) semisweet chocolate chips

1. Preheat oven to 350, and grease an 8x8 pan (or spray it with cooking spray).

2. Melt chocolate in microwave and let cool 7-10 minutes.

3. Combine flour, baking soda, and salt in a small bowl.

4. In a mixing bowl, beat egg and sugar. Beat in water and oil. Stir in melted chocolate and flour mixture. Mix until well blended.

5. Pour batter into pan. Sprinkle with chocolate chips.

Is this picture blurry, or are my eyes? I can’t tell. I’ve been awake too long. I think it might be the picture. Or maybe my eyes.

6. Bake for about 35 minutes or until a toothpick inserted near the center comes out clean. Cool before serving.

And serve with cold milk. This is non-negotiable.

Slow-Cooked Spicy Shredded Pork

We had yet again another winter storm today, so it was a good day to stay tucked inside with something yummy simmering in the slow cooker. I saw a recipe for spicy shredded pork on thepioneerwoman.com, and knew I had to try something like that. (And thanks to dandeelionsoup for pointing me to that site – it cracks me up. And includes much better photography than you’ll find here. But please don’t go away. I like you.)

I decided to try the pork in the slow cooker rather than in the oven. I lose a bit of color on the pork that way, but it sure is handier than having to keep an eye on things in the oven.

I did make some changes to the rub recipe, and I sort of halved it because I used a much smaller roast. I also added some chipotle Tabasco sauce and lime juice after the pork was done because I wanted it to have a bit more kick. But you might want to taste it first to see if you think it needs the extra zing.

Slow-Cooked Spicy Shredded Pork
Serves 8-10

Spice rub
½ tsp. dried oregano, preferably Mexican oregano
1 tsp. ground cumin
¾ Tbsp. chili powder (I used New Mexico red)
2 Tbsp. brown sugar
2 cloves garlic, peeled
½ onion, cut in chunks
1 Tbsp. salt
Fresh ground pepper
1 Tbsp. white wine vinegar
1 Tbsp. olive oil

3½-lb. pork shoulder
2 Tbsp. chipotle Tabasco (optional)
2 Tbsp. lime juice (optional)
Tortillas and toppings, for serving (or use this as filling in whatever Mexican dish you like)

1. Combine the spice rub ingredients in a food processor. Process until smooth.

It’ll get more appetizing. Just keep an open mind.

2. Spread rub on all sides of pork, rubbing into crevices.

Rubbing meat is kind of a hobby of mine.

3. Put pork in slow cooker. Cover and cook on low 8 hours, or until pork is tender.

4. Remove pork from slow cooker and shred meat with two forks. Return to slow cooker, combine with juices, and heat through. Add Tabasco and lime juice, if you choose.

5. Serve pork with tortillas and toppings, or as filling for enchiladas, burritos, and the like.

I ate mine in tortillas with rice, pepper cheese, red onion, tomato, and more chipotle Tabasco. And no lettuce for some reason. How odd.

Monday, December 29, 2008

Slow Cooker Moroccan Chicken

See the super-cool new logo at the top of my blog? We’ve been branded! That’s courtesy of my incredibly thoughtful, uber-talented brother-in-law, whom we call Matty-Pants. (Not to protect his identity. That’s just what we call him.) Matty-Pants gave me a collection of related logos to use. I want to put them everywhere. On my apron. On my recipe cards. On the side of my car. Perhaps a forehead tattoo.

But back to the food. When the hubby and I were in Chicago a few months ago, we took a walking food tour. At one of the stops, a catering company/deli, we saw some Moroccan chicken in the window. The hubby said, “That looks good. We should try to make something like that.” Now, I have relatively nothing to go on here. It looked like baked chicken with maybe olives and red peppers. But I vowed I’d figure something out, even though the hubby no longer has any recollection of this event and wasn't any help.

So today I attempted to create something that resembles my vague memory of Moroccan chicken. I decided to use the slow cooker instead of baking or broiling the chicken (because I love my slow cookers), after I rubbed the chicken with lemon juice and spices, and browned it. Then I created a sauce of the pan drippings, chicken broth, kalamata olives, peppadews, and dried apricots. It kind of gives the dish an overall hot/sour/sweet/salty mix, which is fabulous.

You can substitute roasted red peppers for the peppadews. That’s what I was going to use, but then I saw the peppadews at the olive bar and couldn’t resist. (I love saying “at the olive bar.” I sound hip.) The dish may not appear to be kid friendly, but you could omit the olives and peppers and the chicken would still be very flavorful. (As a child, I wouldn’t go near an olive with a 10-foot pole. I also wouldn't as a 25-year-old.) Also, you can scale back on the spice mixture if you think the flavor might be too overwhelming for young palates.

Slow Cooker Moroccan Chicken
Serves 4

Spice rub
½ Tbsp. ground cumin
1 tsp. ground turmeric
½ tsp. paprika
½ tsp. ground coriander
¼ tsp. cayenne pepper

4 chicken breast halves
4 Tbsp. lemon juice
2 Tbsp. olive oil
Salt and pepper
½-¾ c. chicken broth
½ c. sliced kalamata olives
¼ c. chopped peppadews or roasted red peppers
¼ c. chopped dried apricots

1. Combine spice rub ingredients in a small bowl.

I like this photo. It’s kind of psychedelic. It makes me dizzy.

2. Sprinkle the chicken breasts with half the lemon juice and half the spice rub. Use your fingers to work it in a bit. Flip the chicken and top with the remaining lemon juice and spice rub.

3. Heat oil in a large saute pan or frying pan over medium-high heat. Brown the chicken on both sides, sprinkling with salt and pepper.

4. Move chicken to slow cooker.

5. Reduce heat to medium and add chicken broth to pan, scraping up all the bits in the pan. Add olives, peppers, and apriots.

You can’t see the apricots in this picture. They were an afterthought. I'm crazy that way.

6. Pour sauce over chicken. Cook on low heat 4-6 hours, or until chicken is tender.

7. Serve with rice or couscous.

I went with rice. The hubby doesn’t really like couscous, and I had to suck up to him up after I put apricots in his supper.

Sunday, December 28, 2008

Jumbo Chocolate-Toffee-Cream Cheese Muffins

These are my favorite muffins in the whole wide world. Which is kind of like choosing your favorite child, but hey, we’re only human.

I created this recipe after testing several jumbo chocolate chip muffin recipes, but something was missing. I decided it was cream cheese, because I love the combo of cream cheese with semisweet chocolate). I needed something to sprinkle on top, so I tried chocolate-covered toffee bits. And then threw some in the batter for good measure. (It was a very wise decision.)

The hubby dislikes muffins in general, but he devours these. The batter isn’t dry in the least, and it’s chock full of chocolate chips, chocolate-covered toffee, and chunks of cream cheese. These are certainly part of a healthy, complete breakfast. The hubby prefers his warm, so the chocolate chips are melty. I prefer mine cold, so the cream cheese taste is more assertive. To-may-to, to-mah-to, it’s all good.

Jumbo Chocolate-Toffee-Cream Cheese Muffins
Makes 6-9 (I usually get 9)

8 oz. cream cheese, softened
¼ c. butter, softened
1 egg at room temperature
½ c. plus 1/3 c. milk
½ tsp. vanilla extract
1¾ c. flour
½ c. sugar
½ c. brown sugar
2 tsp. baking powder
½ tsp. salt
2/3 c. chocolate chips
½ c. Heath or Skor bits, plus more for sprinkling

1. Preheat oven to 400 degrees.

2. Using a mixer, beat cream cheese and butter until smooth. Beat in egg, milk, and vanilla. (Leave the mixture a bit chunky so your cream cheese stays chunky in your muffins.)

It’s rather lumpy and unattractive, I know. Kind of how I feel after all that holiday eating.

3. In a large bowl, combine flour, sugars, baking powder, and salt.

4. Make a well in the flour mixture and add cream cheese mixture. Stir until just combined. Add chocolate chips and ½ c. chocolate-covered toffee bits.

5. Place liners in jumbo muffins tins. Spoon batter into liners until they’re about ¾ full. Sprinkle tops with additional toffee bits.

6. Bake 20-25 minutes until muffins are golden and a toothpick comes out clean.

7. Let muffins cool in pans about 5 minutes before removing. Then let cool on cooling rack.

Hash Brown Quiche

My friend and former roomie Sarah is visiting from Alaska (by way of South Dakota), and she had a late night hanging out with some other friends last night. I figured I’d throw together some brunch for her rather than waking her up bright ‘n’ early with breakfast. Because I’m a bright ‘n’ early kind of gal.

Unfortunately, we haven’t gotten groceries since before we left town for the holidays, so my options were a bit limited. (Yes, I could have gone to the store. But that would have required me to leave the comfort of my candy cane-striped pajamas, which I’m just not ready to do.) So I threw together some muffins and a hash brown quiche.

This quiche recipe comes from my ol’ Swenson family reunion cookbook, and I’ve used this many, many times when entertaining or for potlucks. The crust is hash browns instead of pastry, and while this looks more like an egg bake than a quiche, the filling only has a few eggs. So it is actually more quiche-like. But with lots more cheese.

This recipe uses ham, but you can substitute other meat and/or veggies. Toss in some sautéed onions and peppers with the ham if you want more of a Denver omelet-type quiche. Or use peppers, onions, and mushrooms for a vegetarian option. You can also substitute whatever cheese you prefer; this morning, I used half pepperjack and half Colby Jack.

I halved the recipe for brunch this morning; this dish is quite rich, and with only three of us, we definitely didn’t need a full-size pan. And one should really eat only so much leftover quiche.

Hash Brown Quiche
Serves 12

32 oz. frozen shredded hash brown, thawed
2/3 c. melted butter
2 c. diced ham
½ c. shredded pepperjack cheese
1 c. shredded Swiss cheese
2 c. shredded cheddar cheese
1 c. cream
4 eggs
Salt and pepper

1. Preheat oven to 425 degrees.

2. Place hash browns in a 9x13 baking dish. (I used a 9" pie plate since I was halving the recipe.)

3. Brush melted butter over hash browns. Bake 30 minutes. (You can actually do this step the night before and refrigerate the crust.)

4. Sprinkle ham on crust.

5. Beat eggs and add cream, then stir in cheese. Add salt and pepper.

6. Pour egg mixture over ham and cover with foil.

7. Reduce oven temperature to 350 degrees , and bake 30 minutes. Let set 5-10 minutes before serving.

Jumbo Apple-Walnut Muffins

I make muffins. Everybody has a thing, and making jumbo, decadent muffins is mine.

I started making muffins a few years ago, when my hubby’s sister was getting married. I wanted to make something special for her bridal shower brunch, so I figured I’d experiment with some recipes. So many of them were dry and cakey and shameful. So I started throwing in sour cream. Buttermilk. Cream cheese. And tastier ingredients, like chocolate, and butterscotch, and toffee. Lo and behold, I had me a hobby.

Since then, I’ve developed three basic batters that work well for me – a traditional muffin batter, an oatmeal batter, and a cream cheese batter. And when I get an idea for some fillings, I try to work them into one of those batters.

A few tips for making muffins:
  • Bring your eggs, milk, and other refrigerated ingredients to room temperature before using.
  • Don’t overmix your batter. The more you mix, the flatter your muffins will be.
  • Taste your batter as you go along. If it doesn’t taste good, your muffins won’t, either.
  • Fill any extra muffin cups with water to help ensure even baking if your muffin pan is only partially full.
  • Only make jumbo muffins. Those normal-sized ones are just pathetic. (You had to hear this. I say it because I care.)

As I was baking an apple pie earlier this fall, I got an idea to make some apple muffins. With something crunchy, like walnuts. And cream cheese. That was flavored with shredded apples, cinnamon, and nutmeg. And this recipe was born. (Next time I might add some caramel.)

Jumbo Apple-Walnut Muffins
Makes 6-9

1¾ c. flour
½ c. sugar
½ c. brown sugar
2 tsp. baking powder
½ tsp. salt
¼ tsp. cinnamon
1/8 tsp. grated whole nutmeg
1½ apples (about 1½ c.), peeled and chopped
8 oz. cream cheese, softened
¼ c. butter, softened
½ apple, grated
2/3 c. milk
½ tsp. vanilla
Dash of cinnamon and grated whole nutmeg
½ c. toasted walnuts, chopped

Streusel topping
3 Tbsp. flour
¼ c. sugar
¼ tsp. cinnamon
1/8 c. toasted walnuts, chopped
2 Tbsp. butter

1. Preheat oven to 400 degrees. In a large bowl, combine flour, sugars, baking powder, salt, cinnamon, and nutmeg. Fold in apple pieces.

2. Using a mixer, combine cream cheese and butter until creamy. Add grated apple, milk, vanilla, cinnamon, and nutmeg. Mix until combined, but cream cheese is still chunky.

3. Make a well in the center of the dry ingredients and add cream cheese mixture. Add walnuts. Stir until just combined.

4. Put liners in about 8 jumbo muffin cups. Fill muffin cups ¾ full, and fill empty muffin cups with water.

5. Combine streusel ingredients in a small bowl using a pastry blender. Top muffins with streusel topping.

6. Bake about 25 minutes, or until tops are golden and a toothpick comes out clean.

7. Cool in pan 5 minutes, then remove from pan and cool on rack.

Tuesday, December 23, 2008

Sweet-Sour Spinach Salad

I prepared this salad ahead of time to bring to my grandparents’ house for Christmas Day dinner, per my grandma’s request. I first made this salad for Thanksgiving dinner last year, and the family raved about it. I chose the salad because it’s low-fat, I could easily substitute Splenda in the dressing for my grandpa (who loves spinach), and my grandma loves vegetable salads, but is allergic to lettuce.


This recipe was printed in Light & Tasty magazine, and the only notable change I made was to use Splenda or another sugar substitute in the dressing to make this more diabetic friendly. (You can also find some sugar-free ketchups, but these haven’t appeared on my grocery shelves just yet.)


This salad is obviously very healthy; I’ve heard that a good rule of thumb for healthful eating is to eat a rainbow of food colors to ensure you’re getting all your nutrients. (This is different from tasting the rainbow that is Skittles, just FYI.) This salad has quite the eyeful of color when it’s assembled, as you can see even in the prep stage.


The salad has many elements of the classic spinach and bacon salad – spinach, mushrooms, bacon, red onion, and a tangy, Catalina-like dressing. The addition of garbanzo beans (chickpeas) is interesting; they’re a very nutty bean, so they make a good substitute for nuts or croutons. And although I’m a huge, huge fan of bacon, you can easily leave it out here for a delicious vegetarian option.

I love, love, love this dressing. It tastes like a French or Catalina dressing, but the garlic gives it an extra zing on the tongue. I could easily use this as my everday salad dressing.

Sweet-Sour Spinach Salad
Serves 6-8

10 oz. fresh spinach
8 oz. sliced water chestnuts, drained and halved
½ c. thinly sliced summer squash
½ c. sliced mushrooms
1/3 c. garbanzo beans, rinsed and drained
¼ c. chopped red onion
3 strips bacon, cooked and crumbled

(Mom, I cooked the bacon in the microwave instead of on your stovetop. Merry Christmas.)

Dressing
2 Tbsp. sugar or sugar substitute, such as Splenda or Equal
2 Tbsp. canola oil
2 Tbsp. ketchup
1 Tbsp. water
1 Tbsp. cider vinegar
1 garlic clove, grated
¼ tsp. salt

1. Combine spinach in a large bowl with water chestnuts, squash, mushrooms, garbanzo beans, and onion.

2. Combine dressing ingredients in a small bowl until thoroughly mixed.

3. Toss salad with dressing. Top with bacon.


Pumpkin Pie

The hubby and I are staying with my family for a few days, which means I’m cooking in Mom’s kitchen. Which drives us both nuts.

We’re in the middle of yet another weather advisory, which makes me hungry for all things warm, like stew. So I put on a pot of beef stew earlier this morning, even though Mom and I exchanged words about it last night. (“Stew? Do you HAVE to make stew again? There’s a bunch of food in the fridge. Can’t you make do with that?”)

Now, I wouldn’t dream of disrespecting my own mother, but aside from the food that’s set aside for Christmas festivities, we appear to have a few smoked pork chops, leftover dessert pizza, several tubs of butter, and about five pounds of red grapes. So my official answer is no. No, I can’t make do with that.

After I got the stew going, I decided to bake a few pumpkin pies – one for my pa and one for Christmas Day with my mom’s family. I’ve made several pumpkin pie recipes over the years and they all got the “Mmm, pumpkin” reaction, but it wasn’t until Thanksgiving last year that I got what I was hoping for: “This is the best pumpkin pie I’ve ever had.” Four people said it. That’s like a quorum. If four people say it, it’s got to be true.

I did need to bring supplies and ingredients from home. Supplies like my favorite whisk and my microplane. And ingredients like whole nutmeg, pumpkin, and evaporated milk. And eggs. (My parents don’t buy eggs!) I did, however, forget my trusty pie crust shield, which makes my heart sad. Sigh.

Pumpkin Pie
Serves 8

1 pie crust, homemade or storebought
2 eggs
½ c. sugar
1 tsp. cinnamon
½ tsp. salt
½ tsp. ground ginger
1/8 tsp. freshly grated nutmeg (I think fresh makes a world of difference)
1 15-oz. can pumpkin (NOT pumpkin pie filling; that’s what you’re making here)
1 12-oz can evaporated milk

1. Heat oven to 425 degrees.

2. Place crust in a 9” pie plate and crimp edges.

My edges are never neatly crimped. I have manual dexterity issues. I got an Unsatisfactory in kindergarten Scissor Handling.

3. In a medium bowl, beat eggs lightly. Add remaining ingredients and beat with a whisk until smooth and thoroughly combined. (I don’t like to use a mixer with this. It makes the filling too frothy.)

By the way, see this teeny tiny section of counter space? This is really the only workspace in this kitchen. I should be sainted.

4. Pour filling in crust.

5. Cover edges of crust with aluminum foil or a pie crust shield. Try to do so without squashing your crimps. (If you're using foil, this is nearly -- but not quite -- impossible.)

This is optional, but highly recommended, because your crust can burn before your filling is baked. You know how when you’re out in the sun without sunscreen, and your nose burns first? If this pie were your face, the crust would be your nose. Don’t burn your nose.

6. Bake 15 minutes.

7. Reduce temperature to 350 degrees and bake an additional 45 minutes. Remove from oven.

Look at the gorgeous color on that non-burnt crust!

8. Let cool for at least a few hours before serving. Slice and serve with whipped cream. Even if it's frozen.

Monday, December 22, 2008

Barbecued Pork Sammiches

The hubby and I have been cooking up a storm out at the ranch, although we haven’t actually spent that much time in the kitchen. (My mother-in-law is baking. We’re trying to stay out of her way.) We’ve made barbecues, shrimp scampi and chicken scampi, scalloped potatoes and ham, and barbecued pork sammiches.

These shredded pork sandwiches are my all-time most-requested recipe. They are so yummy and yet so unbelievably simple, because I take a lot of shortcuts: namely, the slow cooker, the Rib Rub, and the storebought sauce. Go ahead and make your own rub and sauce, or choose your favorite storebought brands; these are just my own favorites.

I first made these sandwiches years ago, and the hubby and I agreed that the first batch was fabulous. However, we thought they could still be better. The hubby recommended rubbing the pork shoulder with the rub that he uses on his ribs, and so this technique was born. And while it’s not necessary, it does make a difference.

I’ve brought these sandwiches for dozens of potlucks over the years, and I even served a huge batch at a grand opening of the new office for my dad and the hubby. And I spent the entire next day answering requests for the recipe. So very easy, but very impressive.

Barbecued Pork Sammiches
Serves 10-12

1 2- or 3-lb. pork shoulder roast, trimmed (you can also use pork loin roast, but you might need to chop it rather than shred it)
Famous Dave’s Rib Rub
1 tsp. onion powder
1 tsp. garlic powder
Salt and pepper, to taste
2 tsp. hickory liquid smoke
18 oz. barbecue sauce (I only use Famous Dave’s Rich & Sassy)
Buns, for serving

1. The night before you’ll be making your pork, sprinkle it on all sides with Rib Rub.

2. Wrap in plastic wrap and refrigerate overnight. It should look nice and yummy the next morning, when the seasoning has penetrated the meat.

Not "yummy" in that you want to eat it now. Just "yummy" in that you know it'll be good later.

3. Place roast in slow cooker. Top with onion powder and garlic powder, and sprinkle with salt and pepper, and liquid smoke. Pour barbecue sauce over roast.

4. Cook on low 6-8 hours, or until roast is tender and cooked through.

5. Remove roast from slow cooker and shred meat with two forks.

6. Return meat to slow cooker and stir with sauce, adding more sauce if necessary. Heat through.

7. Serve on buns.

Dad’s Barbecues

The hubby and I made it to the ranch on Friday, and we had a brief but intense brush with the storm that was heading toward us. Then we burrowed inside for the rest of the weekend, decorating the tree, wrapping gifts, watching TV, and napping. It was a good weekend.

For a quick lunch on Saturday, we threw together barbecues. These sandwiches go by a variety of names; you may know of them as sloppy joes, manwiches, loose meat sandwiches, etc. (For some reason, the term “loose meat” makes me queasy. But I digress.) Here in the upper Midwest, we call these barbecues, despite the lack of barbecue sauce. If you go to any small-town event, you will inevitably see a sign at the concessions advertising hot dogs, pizza, and BBQs. They are a Midwestern staple. And every family seems to have its own version.

This version is my dad’s family recipe, and these barbecues remain, to this day, the only ones I like and will voluntarily eat. And they’re incredibly kid friendly; there are no bits of celery or onions to freak out the little ones. (I was a child once. I clearly remember this fear.) This is true comfort food; we tend to make this whenever our family gathers, whether for fun or in times of sorrow. The recipe is so simple, you probably have the ingredients on hand, and even one batch seems to expand to feed a crowd.

As always, adjust the seasonings to suit your taste. If it’s not sweet enough, add more brown sugar. If it’s too mustardy, add more ketchup. (This is actually the first time I’ve attempted to measure the ingredients, so until now, I had no idea what I was putting in. It's probaby slightly different every time.)

Dad’s Barbecues
Serves 4-6

1 lb. hamburger
Salt and pepper, to taste
Onion salt and garlic salt, to taste
1/3 c. water
½ c. ketchup
1 tsp. prepared mustard
1 tsp. brown sugar

1. Brown and crumble hamburger over medium-high heat, seasoning with salt, pepper, onion salt, and garlic salt.

2. Reduce heat to medium low. Add water, ketchup, mustard, and brown sugar, and stir.

3. Bring heat back up to medium and let simmer about 5 minutes, or until mixture is heated through.

4. Serve on buns.

We apologize for the lighting and focus issues. Thanks, The Management.

Friday, December 19, 2008

Happy Holidays

Holidays greetings from us, Santa, and Mentos (the Freshmaker). We send our best to you and yours, and wish everyone safe travels.

We’ll be heading out of town, as well. My Internet access in yon places is oftentimes spotty, but I will post when I get the opportunity.

Peace out. Eat cookies.

Cream Wafers

So far today, I’ve baked a sugar cookie coffee cake, two batches of peanut blossoms, and Christmas cookies. I feel like Wonder Woman. But with no makeup, messy hair, and flour on my breastplate. (And I’m not actually wearing a breastplate. Today.)

Now, on to cream wafers. I got this recipe from one of the Taste of Home magazines a few years ago. I just thought they were so darn cute in their picture that I had to try them. And they were fabulous. These little sandwich cookies are perfect for any holiday cookie try or cocktail party.

The wafer dough is not a sweet dough; it’s actually more like a tart crust or shortbread. But when you sprinkle it with sugar and add the sweet, creamy filling to the wafer, it’s a perfect combination.

Did I mention they’re cute?

Cream Wafers
Makes about 30

½ c. butter
1 c. flour
3 Tbsp. heavy cream
Sugar for sprinkling

Filling
¼ c. butter
¾ c. powdered sugar
½ tsp. vanilla
3 Tbsp. heavy cream
Food coloring

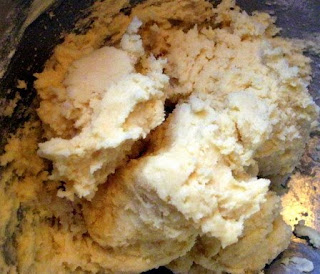
1. Beat butter, flour, and cream in a bowl until a ball of dough forms.

2. Shape dough into a disk. Wrap in plastic wrap and refrigerate 1 hour.

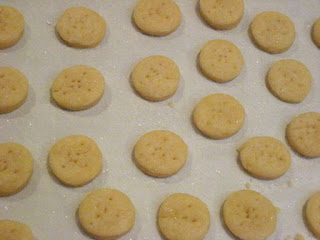
3. Preheat oven to 375. Roll dough out to a thickness of 1/8”. Cut with a floured donut hole cutter or other 1” round cutter.

If the dough sticks in the donut hole cutter, poke a knife through the openings on the other side to pop it out.

Continue until you've used up all the dough.

Heh. It’s like a Connect Four board.

4. Place wafers on a baking sheet. Sprinkle with sugar and poke with a fork to keep them from puffing up too high. Bake for 7-9 minutes, then cool completely.
5. Combine filling ingredients to desired consistency. Add food coloring.

6. Carefully spread half the wafers with icing, and top with the other halves.

7. Serve immediately or refrigerate.

Christmas Cookies

First off, I apologize for the lapse in postings this week. And thanks to those of you who sent concerned and/or angry messages. No, I’m not sick. No, I’m not dead. No, I don’t find my leftovers interesting enough to post about. It’s been a very busy week, with the holidays coming up so quickly. We’ve been finishing up our shopping, wrapping gifts, visiting Santa, and other necessary holiday tasks.

Today we’re on the cusp of another big snowstorm, so I’m hurrying to finish my Christmas baking (and pack, and wrap those last few gifts, and find someone to feed my cat) before we leave town early this evening.

First on my List of Important Things to Do is make Christmas cookies for my dad. Iced cutout sugar cookies are his favorite holiday treat, and he begs someone to make them each year. He doesn’t ask for much. Really. Some years he’s content if someone throws together a dry packaged mix of sugar cookies, even using Egg Beaters instead of real eggs. (Note to Mom and Dad: Buy real eggs!)

I do enjoy eating Christmas cookies, but I lack the patience for rolling out the dough, cutting out the cookies, and – most of all – frosting them. We did this as a family when I was a kid. And it was fun, for about the first four cookies. Mom would be the first to disappear, using laundry as an excuse. My dad, best known for his stunning Mr. Yuk replica cookies, would eventually start to slack off. And my sister and I would get bored and start mixing all the frosting colors together to create lovely shades of brown.

But I love my dad. He deserves his cookies.

I try a different Christmas cookie recipe each year, and they’re all pretty similar. This year I’m using a recipe from Cuisine at Home, with a few modifications. And I’m also trying some royal icing. We used a powdered sugar and milk icing when I was growing up, and while it tasted good and spread well, it was very drippy. So after a long, involved hunt for meringue powder (thank you, Creative Kitchen), I was able to try my hand at royal icing. And it turned out really well. It spreads easily, it’s very shiny, but it’s not nearly as runny.

Keep in mind that this recipe doesn’t make many cookies: I ended up with about two dozen. If you’re looking to make a huge batch, double or triple as appropriate. If you hate frosting cookies, two dozen is perfect.

Christmas Cookies
Makes about 2 dozen

1½ c. flour
½ tsp. baking powder
½ tsp. salt
½ c. unsalted butter
1/3 c. sugar
¼ c. powdered sugar
1 egg
2 Tbsp. heavy cream
1 tsp. vanilla extract
½ tsp. almond extract

Royal Icing
Makes about 2 cups

1 lb. powdered sugar
1/3 c. water
2 Tbsp. meringue powder
Food coloring

1. Whisk together flour, baking powder, and salt in a small bowl. Set aside.

2. Cream butter and sugars in a bowl with a mixer, blending until smooth. Add egg, cream, vanilla, and almond extract and blend.

3. Add half the dry ingredients; mix until nearly incorporated. Blend in the remaining dry ingredients.

4. Shape dough into a disk, wrap in plastic wrap, and refrigerate at least 2 hours.

5. Preheat oven to 350 degrees. Line baking sheets with parchment (optional, but this REALLY helps).

6. Roll half the dough out on a well-floured surface to about 1/8” thick. (I usually go even a little thicker, because I like a softer cookie.) Cut out shapes with cookie cutters – metal are best. Transfer to baking sheets.

7. Bake 10-12 minutes, or until lightly golden. Let cookies cool on pan 5 minutes before transferring to cooling rack.

8. Beat all icing ingredients together with a mixer until set. Spoon small amounts of icing in individual bowls and tint with food coloring as desired. If icing is too thick to spread, add a bit of water to thin to desired consistency.

9. Ice cookies and let set before storing.

You can be one of those fancy-pants people who pipes icing around the edges and then fills in the cookie. Just don't be knocking my childlike style.

Monday, December 15, 2008

Pizza Paninis

When we were growing up, I was always “a very good eater” (a little piggie). My brother Cory, on the other hand, lived primarily on the three Ps: pizza, popcorn, and Pop Tarts. it doesn't seem to have harmed him; the kid's smart and 6'3".

Cory is much better now about trying new foods – my jaw dropped a few years ago when we went out for sammiches and he ordered his with green peppers – but I know he still loves his three Ps, and I like to accommodate on occasion and feed the craving.

We were still snowed in at lunch today, and after a morning of rigorous shoveling and vigorous candy drizzling, we threw on some pizza paninis for a quick and easy lunch. This is less of a recipe and more of an idea; and, as with any sammich or pizza, modify the fillings/toppings according to your tastes. I sure do like my ham and pepperoni, but these would also be great with salami, crumbled cooked sausage, and/or whatever veggies float your boat.

Pizza Paninis

Per person:
1 sandwich roll
Butter
Italian seasoning
2-3 slices deli ham
2 slices sandwich-size pepperoni
1 slice provolone cheese
1 oz. fresh mozzarella
Pizza or spaghetti sauce, for dipping

1. Slice the roll in half lengthwise and butter the outsides of the roll (as you would for a grilled cheese). Sprinkle with Italian seasoning.

2. In a panini press or frying pan, assemble the panini: Layer ham, pepperoni, and then the cheeses.

We were running short on fresh mozzarella. We had to play nice and share.

3. Add top of bread, and press down to grill. Cut and serve with heated sauce.
Macadamia Nut Chews

This is a new recipe that I decided to try this year. No particular reason, just that the combination of macadamias, homemade caramel, and milk chocolate sounded utterly divine.

This is an Emeril Lagasse recipe, and the only change I made was to drizzle the chews with chocolate rather than coating them. (Our taste-testing panel determined that too much chocolate overwhelms the taste of the caramels.)

On a convenience note, Mauna Loa sells bags of prechopped macadamias, which are a girl's best friend. Keep an eye on the nuts when you toast them; I put mine in for 6 minutes, and they still got a bit brown.

I highly recommend a candy thermometer for this recipe. (I’m too impatient to drop the candy in a glass of water to test it. My father would be so disappointed.) Invest in a decent candy thermometer; the $2 or $3 versions are baiscally a single-use item. (It’s never a good thing when you pull a thermometer out of the drawer and it already reads 130 degrees.) Go to a kitchen supply store and invest in a decent clip-on candy thermometer; it shouldn’t set you back more than $10 or $12. Then, take care of it. Clean it as soon as you can when you’ve finished with it, and avoid putting it in the dishwasher. (I think this has been my primary downfall.) And then, like me, dream of the day when you rise to the ranks of digital thermometer ownership.

But back to the food. I’m not a huge caramel person, but the caramel in this recipe is so good that I licked the pan. When it was still hot. If you’re not a chocolate person, just make the macadamia caramels. If you’re not a macadamia person, either, just make the caramel. It’s. That. Yummy.

Macadamia Nut Chews
Makes about 60

1 tsp. butter
4 oz. macadamia nuts, roughly chopped
2 c. sugar
½ c. brown sugar
¼ c. light corn syrup
Pinch of salt
1 tsp. vanilla
1 stick butter, at room temperature
1 c. heavy cream, at room temperature
1 c. milk chocolate chips

1. Preheat the oven to 400 degrees.

2. Line an 8x8 square pan with aluminum foil, allowing the foil to hang over the edges. Grease the pan with 1 tsp. butter.

3. Place nuts on a small baking sheet and put in oven. Toast until golden brown, about 6 minutes. (You can shake the pan to more evenly toast them. I didn’t use a pan with sides, though, so this would have been a mess.) Remove from oven and cool. Sprinkle over bottom of prepared pan.

4. Heat a medium saucepan over medium heat. Combine the sugars, corn syrup, salt, vanilla, butter, and cream. Stir constantly until fully incorporated, about 1 minute. Raise heat to medium-high and bring mixture to a boil. Reduce heat again to medium and cook, stirring occasionally, until the mixture reaches 254 degrees (hardball stage). (This will take about 15 minutes.)

5. Pour caramel over nuts. Place pan in a draft-free area and cool completely. (It’s fun to watch the macadamias pop up into the caramel. I’m easily amused.)

6. Turn caramel onto cutting board and cut in 1” squares.

7. In a small bowl, melt chips. Put into a small resealable bag and cut the edge of one corner. Use as a piping bag to drizzle melted chips over chews.

Heh. I'm in my jammies.

8. Lay on wax paper until chocolate sets.

Macadamia chews as far as the eye can see!

9. Store in an airtight container. The recipe says don’t refrigerate; I’m guessing they harden. I might refrigerate one just to see what happens. I’m daring that way.
Update: I like the refrigerated version better. However, the "airtight" thing is key. If you move the chews from your functional Tupperware to your lovely, non-airtight candy tins, you might end up with macadamia nut bars rather than macadamia nut chews. You've been warned.