Showing posts with label low-fat. Show all posts

Saturday, December 22, 2012

Slow-cooked Turkey Breast with Gravy

When it comes to holiday cooking -- or entertaining in general -- I typically find the logistical side of things much more daunting than the actual cooking. Figuring out when to make everything so it's all done at the same time is challenging, but finding space to cook it all can be almost impossible.

This fall, I tested various cooking methods with turkeys in an attempt to get them out of the often. This slow cooker recipe ended up becoming such a favorite that the hubby requested it three times within the span of about six weeks. That's a lot of turkey.

The downsides to this recipe include the fact that this makes a turkey breast, not a whole turkey. And the skin doesn't crisp up, so you lose that wow factor (and the flavor of the toasty skin).

But this recipe is so easy, and the meat is so tender and delicious that I don't even miss the skin, which I shouldn't be eating, anyway. And the drippings make fabulous gravy, which I doctor up using my dad's tried-and-true cream of chicken soup method.


Slow-cooked Turkey Breast with Gravy
Makes 8-10 servings

  • 1 bone-in turkey breast (about 6-7 pounds)
  • 2 tablespoons butter, softened
  • 1/2 teaspoon salt
  • 1/2 teaspoon dried rosemary, crushed
  • 1/2 teaspoon dried thyme
  • 1/4 teaspoon garlic powder
  • 1/4 teaspoon freshly ground pepper
  • 1 14.5-ounce can chicken broth
  • 2 cans condensed cream of chicken soup
  • 1 can water
  • 4 heaping tablespoons cornstarch
  • 1/2 cup water
  • Salt and pepper, to taste
  •  
    1. Put turkey in 6-quart slow cooker. Rub with butter. Combine the salt, rosemary, thyme, garlic powder and pepper; sprinkle over turkey. Pour broth over turkey. Cover and cook on low 5-6 hours, or until tender.
    2. Remove turkey from slow cooker. Cover with foil and set aside.
    3. Pour turkey drippings into a pan on the stove top; skim fat from drippings.
    4. Add cream of chicken soup and 1 can water and combine. Bring gravy to a boil, and then reduce heat to medium. Simmer about 10 minutes.
    5. Combine cornstarch and water. Return gravy to a boil and add cornstarch mixture, whisking constantly. When gravy reduced desired thickness, reduce heat to low. Season to taste with salt and pepper.
    6. Carve turkey and sprinkle with salt and pepper, if desired. Serve with gravy.

    Wednesday, December 19, 2012

    Roasted Autumn Vegetables

    I'm back! Or at least, I hope to be. The short delay I'd intended with my blogging turned into more of an indefinite leave of absence as the hubby and I have been adjusting to our new schedules. As I mentioned many, many moons ago, we bought our local newspaper and now find ourselves working nearly four full-time jobs between the two of us. A few things had to give in the schedule, like blogging. And cleaning.

    But not cooking. In fact, I find myself cooking as much now as I ever have. A big part of that is because I write a weekly food column in the paper, so I'm constantly testing new recipes, or remaking favorites with new, newspaper-friendly photos.

    But I do miss blogging, and I'm hoping to get back to it, although maybe not as often as I did before. And probably with fewer step-by-step photos. And I promised my fellow publishers that I'd put any new recipes in print, first -- although I'm not sure if my column is that hot a commodity!

    I'll start by attempting to backfill some of the recipes I've worked on the past several months, so some of them might seem a bit out of order or out of season. And then once I catch up, hopefully things will get back to normal!

    I'll start with Roasted Autumn Vegetables, which might not sound terribly exciting, but is a healthy and tasty side dish that's especially great around the holiday season. This dish is simple and colorful, and pretty hand-off.


    Notes:
    • Swap in other root vegetables or change the quanitites according to your preferences.
    • If you double the recipe, put the vegetables on two pans and rotate them halfway through the cooking process.
    • Leftovers taste great in soup. Saute some shallot (or a little onion and garlic), add broth, and then add leftover vegetables and cooked tortellini. Season to taste with salt, pepper, and crushed red pepper flakes.
    Roasted Autumn Vegetables
    Makes 6 servings
    • 1/2 pound baby carrots, halved
    • 1 medium red onion, cut in 16 wedges and separated
    • 1 small butternut squash, peeled, seeded and cut in 1-inch chunks
    • 1 large sweet potato or yam, peeled and cut in 1-inch chunks
    • 2 medium Yukon gold potatoes, scrubbed and cut in 1-inch pieces
    • 1 clove garlic, minced
    • 2 tablespoons olive oil
    • 1 teaspoon dried (rubbed) sage
    • 1 teaspoon dried rosemary, crushed
    • 1/2 teaspoon salt
    • 1/4 teaspoon pepper
    1. Preheat oven to 425 degrees F. Spray large jelly roll pan with nonstick cooking spray.
    2. Place vegetables in pan. Pour oil over vegetables. Sprinkle with seasonings and stir to coat.
    3. Bake 35-45 minutes, or until vegetables are tender.

    Sunday, April 29, 2012

    Teriyaki Chicken with Noodles

    When the hubby and I moved to my small hometown, we knew there would be a few trade-offs. At the top of the list are the hubby’s sisters, whom we don’t see as often as we’d like.
    A distant second is running errands when the stores aren’t busy. It’s more difficult now to shop at 9:30 on a Wednesday night so I can actually look at the color of a lipstick before I buy it.
    Lastly, we miss Chinese food delivery.

    We didn’t do delivery frequently, but it was reassuring to know that it was always there. Spring-cleaning and you’re too tired to cook? Chinese! Surprise houseguests and you just got home from work? Chinese! Baby’s been screaming from a roseola-induced fever and you haven’t slept in four nights and it’s Thanksgiving Day? Chinese!
    The hubby and I still need a regular Chinese food fix, so we make our own. This dish is healthy and quick, and you can easily change it up by using pork or beef instead of chicken, or adding different (or more) vegetables.

    If you don't have sake or mirin, white wine or chicken broth are both acceptable substitutes, If you add about ¼ teaspoon of sugar or so to make up for the mirin’s sweetness.
    A mushy noodle does not a happy Alyssa make, so in stir-fries, I use sturdier Chinese egg noodles, udon noodles, or soba noodles. In a pinch, you can use linguine or even ramen noodles.

    Teriyaki Chicken and Noodles
    Serves 3-4
    1 clove garlic, minced
    1½ teaspoons grated fresh ginger
    1/3 cup low-sodium soy sauce
    1 tablespoon sake
    ¼ cup mirin
    1 pound boneless, skinless chicken breast, cut in thin slices

    Dash of salt
    2 tablespoons canola or vegetable oil
    1 teaspoon dark sesame oil
    2 teaspoons sugar
    ½ teaspoons crushed red pepper flakes (optional)
    1 onion, cut in thin wedges
    4 scallions, cut in 1” pieces
    14 ounces fresh noodles, cooked according to package directions (about 9 ounces dried noodles)
    Toasted sesame seeds, for serving


    1. Combine garlic, ginger, soy sauce, sake and mirin in a bowl. Add chicken and toss until coated, and sprinkle with salt. Refrigerate 30 minutes.


    2. Add 1 tablespoon canola oil and ½ teaspoon sesame oil to a wok. Heat over medium-high to high heat. Drain chicken (reserving marinade) and add to pan, stir-frying until chicken is golden and cooked through.


    Remove from pan.

    3. Meanwhile, add reserved marinade to a small saucepan. Add sugar and crushed red pepper flakes. Boil 2 minutes and then reduce heat. Simmer until sauce is slightly syrupy. Remove from heat.

    (Bringing the sauce to a boil is essential to kill off any bacteria from the chicken. For the love of Pete, do not skip this step.)
    4. Add remaining oil to the wok and add onion. Stir-fry 3-4 minutes, or until softened.

    5. Return chicken to the wok. Add scallions and drained noodles, tossing well to combine. Add sauce and cook 1-2 minutes. Sprinkle with sesame seeds before serving.

    Sunday, March 25, 2012

    Pasta e Fagiole Soup

    My little man’s favorite food is soup (except when it’s cupcakes), and we typically make at least one pot of soup each week. Soups with pasta and beans are tops in his book, and we created this light and flavorful soup a few weeks ago.
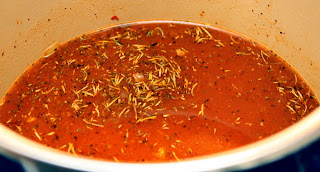
    The soup gets a lot of flavor from a lot of sautéing, as you’ll notice in the steps. Add ingredient, sauté. Add ingredient, sauté. Each ingredient cooks separately and releases its own flavor to the pot.
    This process starts with sautéing pancetta. You can easily substitute bacon, although it might be a bit chewier in the soup. You can also substitute chopped ham, or even a half-pound of ground beef or Italian sausage, to make the soup heartier. (You could also omit the meat entirely.)
    A small pasta is preferable in this soup. Ditalini is pretty easy to find, but the little man recommends the slightly larger mezzi tubetti. He also recommends wearing a piece of cooked mezzi tubetti on each of your fingers while you eat.
    And I recommend serving this soup with a swirl of olive oil and freshly grated Parmesan cheese at the end, because they really do give the soup extra taste and richness.
    We both insist that you serve the soup with hot, garlicky breadsticks.
    Jack’s Pasta e Fagioli Makes 6 servings
     
  • 1 tablespoon olive oil
  • 3 ounces pancetta, finely chopped
  • 1 yellow onion, finely chopped
  • 2 cloves garlic, minced
  • 3 ounces tomato paste
  • 2 cans small white beans, rinsed and drained
  • 5 cups chicken broth
  • 2 teaspoons dried Italian seasoning, crushed
  • 1 teaspoon salt
  • 1/4 teaspoon freshly ground black pepper
  • 3/4 cup tubetti or ditalini
  • Additional salt and pepper, to taste
  • Extra-virgin olive oil, for serving
  • Freshly grated Parmesan cheese, for serving

  • 1. In a large pot, heat oil over medium to medium-high heat. Add pancetta and saute until golden and crispy, about 5 minutes.


    2. Add onion and saute until softened and golden, about 5 minutes.


    3. Add garlic and saute about 1 minute.

    4. Add tomato paste. Saute about 2-3 minutes, or until tomato paste starts to turn a rusty color.


    5. Add beans, broth, Italian seasoning, salt, and pepper. Bring to a boil. Reduce heat and simmer 10 minutes.


    6. Add pasta and increase heat to medium. Cover and cook until pasta is tender, about 8 minutes. Season to taste with salt and pepper.

    7. Serve in bowls. Drizzle with extra-virgin olive oil and Parmesan.

    Thursday, February 2, 2012

    Low-Fat Lemon Pound Cake

    My apologies for the lapse in posts these days. To say there's a lot going on would be an understatement. And when I'm stressed, I take comfort in food. Especially sweet food.

    But hey, at least this one is lower in fat!

    This is a Cook's Country recipe that hits just the right citrusy note without being too overpowering with the lemon. And while it's not quite as moist as its full-fat relation, it's nothing that a small dollop of fat-free Cool Whip can't fix.
    Low-Fat Lemon Pound Cake
    Serves 8-10

    For the cake:
    1 1/2 cups flour
    1/2 teaspoon baking powder
    1/4 teaspoon salt
    1/3 cup light or low-fat sour cream
    1 1/2 tablespoons grated lemon zest
    1 1/2 tablespoons freshly squeezed lemon juice
    1/2 teaspoon vanilla extract
    1 cup sugar
    5 tablespoons butter, softened
    1 tablespoon shortening
    3 eggs, at room temperature

    For the glaze:
    2 tablespoons powdered sugar
    1 teaspoon lemon juice

    1. Unload your dishwasher. This is one of those 5-bowl recipes, and you'll appreciate the head start.

    2. Preheat oven to 300 degrees F, and make sure that the oven rack is positioned in the middle so the cake bakes evenly. Grease and flour an 8 1/2" x 4 1/2" loaf pan.

    3. In a small bowl, combine the flour, baking powder, and salt.


    4. In another small bowl, whisk together the sour cream, lemon juice, and vanilla.


    5. In yet another small bowl, combine the sugar and lemon zest.


    6. Using an electric mixer, beat butter, shortening, and the sugar mixture about 2 minutes. Add eggs, one at a time, and mix until combined.

    7. Reduce mixer speed to low, and add one-third of the flour mixture, followed by half the sour cream mixture. Repeat, and then add the last of the flour mixture. Mix on low until smooth, for about 30 seconds.

    8. Pour batter into loaf pan and tap pan against the counter several times.


    9. Bake until cake is golden brown and a toothpick comes out clean, about 60-70 minutes. Cool cake in pan for 10 minutes, then remove from pack and cool on rack for a few hours.


    10. When the cake is cool, combine powdered sugar and lemon juice in a bowl until smooth. Pour glaze over cake and let set 10 minutes before serving. (I actually think it tastes better if it's refrigerated before serving.)


    Friday, January 20, 2012

    Hibachi Chicken and Steak

    The hubby and I love eating at Japanese restaurants, and while the hubby always starts off with some spicy sushi, I save my appetite for the hibachi dishes.

    That's pretty easy to do when I don't like sushi. You have now witnessed the full extent of my willpower.

    It seems like it should be something that's pretty easy to make at home, so we decided to give it a try. This came pretty darn close for us, although it still might be missing something. Maybe some sake? Extra oil? Spatulas flipping through the air and volcanic onions? We'll have to give those a shot.  

    Hibachi Chicken and Steak
    Serves 4-6

    For the chicken:
    1 pound boneless, skinless chicken, cut it bite-sized pieces 
    Salt and pepper 
    1 tablespoon vegetable or canola oil 
    1 tablespoon soy sauce 
    1 tablespoon butter 
    1-2 tablespoons stir-fry or teriyaki sauce (I used a spicy apricot sauce, sort of like General Tso's) 

    For the steak:
    1 pound sirloin, cut in bite-sized pieces 
    Salt, pepper, and Montreal Steak seasoning 
    1 tablespoon vegetable or canola oil 
    1 tablespoon soy sauce 
    1 tablespoon butter 

    1. Heat 1 tablespoon oil in a large skillet or wok over medium-high heat.

    2. Add chicken, and sprinkle with salt and pepper. Cook until chicken is starting to brown on both sides, about 3-4 minutes.

    3. Add 1 tablespoon soy sauce and 1 tablespoon butter. Cook until chicken is cooked through, about 2-4 minutes.


    4. Add stir-fry or teriyaki sauce and toss chicken to coat.


    5. Meanwhile, heat remaining oil in another skillet or wok over medium-high to high heat. (You can go a little hotter with the sirloin, because you don't have to worry about cooking it all the way through like you do the chicken.)

    6. Add sirloin, and sprinkle with salt, pepper, and steak seasoning. Cook until sirloin starts to brown on all sides.


    7. Stir in 1 tablespoon soy sauce and 1 tablespoon butter. If you're feeling adventurous, go ahead and toss in some mushrooms.


    8. Cook until sirloin is cooked through to desired doneness.


    Tuesday, January 17, 2012

    Broccoli Lo Mein with Chicken or Pork

    I love Chinese food, and easy access to it is one thing that I really miss since we moved to our itty-bitty community. Along with pizza delivery, grocery stores that are open past 4 p.m. on Sundays, and my sisters-in-law. Not necessarily in that order.

    I've been cooking a lot more Chinese food at home as a result, although much of it still lacks the restaurant-style appeal. (Am I missing the MSG? Should I let it sit under a heat lamp for a few hours?)

    I gravitate toward lo meins, especially, because like most toddlers, the little man loves him some noodles. Also, I hate making rice. And macaroni and cheese from a box. And Rice Krispie treats. But we've been through that before.

    More so than any lo mein recipe I've tried cooking, this adapted one from America's Test Kitchen tastes more restaurant-style. But fresher and healthier. The sauce is light, yet still flavorful.

    I used pork and broccoli in this version, but I can't wait to try this again with chicken, and maybe swap in some other veggies for some of the broccoli.

    Broccoli Lo Mein with Chicken or Pork
    Serves 4-6

    6 ounces dried linguine
    2 tablespoons toasted sesame oil
    3 tablespoons oyster sauce
    3 tablespoons soy sauce
    2 teaspoons cornstarch
    1/2 cup water, divided
    2 tablespoons vegetable oil, divided
    1 pound pork loin, cut in 1/4" slices
    12 ounces broccoli florets
    4 scallions, chopped
    2 cloves garlic, minced
    Crushed red pepper flakes, for sprinkling

    1. Cook linguine according to package directions in salted water, until al dente. Drain and rinse under cold water. Toss with sesame oil.

    2. Meanwhile, in a small bowl, combine oyster sauce, soy sauce, cornstarch, and 1/4 cup water. Set aside.

    3. Heat 1 tablespoon vegetable oil in a wok or skillet over medium-high to high heat.

    4. Turn on your range hood fan and open a few windows. (This is optional, but still recommended.)

    5. Add half the pork to the wok and stir-fry until golden, about 2-4 minutes.

    6. Transfer pork to a plate and repeat with remaining vegetable oil and pork. Again, transfer pork to a plate.

    7. Add broccoli and remaining 1/4 cup water to wok. Cook, covered, until broccoli is just tender and water has evaporated, about 3 minutes.

    8. Add scallions and garlic and cook until fragrant, about 1 minute.

    9. Return pork to skillet. Add sauce and noodles and toss until well coated. Sprinkle with crushed red pepper flakes, if desired.

    Thursday, January 12, 2012

    Roasted Cauliflower

    This very simple, healthy, not-even-a-recipe recipe is something I made to entice my mother to have supper with us recently.

    Yes, I have to shamelessly bribe her with vegetables.

    I'm not a huge fan of steamed cauliflower, but when roasted, it takes on a much sweeter and more complex flavor. Needless to say, Mom loved this. I got to try a few bites, and we loaded some on the little man's plate. But the rest of the cauliflower went to Mom.

    And when the little man (who eats in sprints) took a quick break from eating and left the room, the cauliflower mysteriously disappeared from his plate before he returned. Hmm ...

    Roasted Cauliflower
    Serves 2-3, or my mom

    1 head cauliflower, cut in florets
    2 tablespoons olive oil
    3 cloves garlic, minced or pressed
    Salt and pepper

    1. Preheat oven to 400 degrees F.

    2. Toss cauliflower with olive oil and garlic, and place in a baking dish. Sprinkle with salt and pepper.

    3. Cover and bake 15 minutes.

    4. Remove cover, increase oven temperature to 425 degrees F, and bake another 10-15 minutes until cauliflower starts to crisp up.

    Sunday, January 1, 2012

    Brined Turkey Breast

    Brining a turkey has long been on my bucket list, and what better way to ring in the New Year and all its resolutions than by tackling something I've always wanted to try?

    Okay, so I actually made this on Christmas Eve. Anyway, I haven't yet tried brining a turkey -- or even eating a brined turkey -- because there really hasn't been much of an opportunity for it. We've only hosted the holidays a few times. We typically need drippings for gravy. You don't want to try it and accidentally screw up the sole main course.

    This is a Betty Crocker recipe, and I decided to try with a turkey breast. It's a good introduction to brining because it fits in the fridge and is just easier to handle. Plus, my dad was already planning to bring a ham, so there wasn't a lot at stake. If the turkey was awful, we surely wouldn't starve.

    One problem I had was finding a turkey breast that wasn't packed in some sort of salt solution. We don't have access to a lot of fresh turkeys in these parts, so I ended up going with the salt-soaked variety. That made the outside pieces of the meat a bit saltier than I'm used to, but not terribly so. Overall, the turkey was incredibly juicy and was infused with great flavor, even if the skin didn't brown and crisp as much as I'd have preferred.

    I wasn't positive if the end result was worth the extra effort, but my mother said it was amazing. She even took home leftovers. And Mom knows best.

    Brined Turkey Breast
    Makes 8-12 servings

    9 cups hot water, plus more to cover turkey breast, if needed
    3/4 cup salt
    1/2 cup sugar
    1 4- to 6-pound bone-in turkey breast, thawed, if frozen
    1 onion, cut in eight wedges
    2 sprigs fresh rosemary
    4 sprigs fresh thyme
    3 dried bay leaves
    Salt and pepper
    6 tablespoons butter, melted
    1/4 cup dry white wine

    1. The day before, mix water, salt, and sugar in a large container or stockpot. Stir until sugar and salt are dissolved. Add turkey. Cover and refrigerate 12-24 hours.

    2. Preheat oven to 325 degrees F.

    3. Remove turkey from brine. Rinse it thoroughly and pat it dry before placing in roasting pan.

    4. Fill cavity with onion, rosemary, thyme, and bay leaf. If necessary, tie some string around it to keep everything together.

    5. Place turkey breast side up and sprinkle with salt and pepper.

    6. Combine butter and wine. Soak a 16" square piece of cheesecloth in the butter mixture and drape over the turkey.

    7. Bake 90 minutes.

    8. Remove cheesecloth from turkey. Remove onion and herbs, but leave them in the pan. Bake 30-60 minutes longer, or until a meat thermometer registers 170 degrees F in the thickest part of the turkey.

    9. Let rest before carving.

    Thursday, December 15, 2011

    Korean Steak

    Every once in a while I have to take a break from holiday baking to cook some real food for the family. This is a variation of a recipe that I found on allrecipes.com, and I've been anxious to try it because I really like Korean beef. The marinade has a longer list of ingredients, but it really does come together quickly.

    I've read before that adding Asian pear to the marinade helps soften and tenderize the beef, but I'd never before seen an Asian pear in my grocery store. Luckily, kiwi can be used as a substitute (but just use a very small amount, like a fraction of a teaspoon). However, when I went to my supermarket to grab a kiwi, what should I find next to the kiwifruit, but Asian pears! (Actually, the sticker on the fruit said "Apple Pear," but the sign said "Asian pear.") I just grated up enough of the peeled fruit to make 1/4 cup of mush to add to my marinade.

    I made a few other changes, as well, and I really liked how this turned out. My only complaint is that I typically like more vegetables in my stir-fry, so I think I'd add some next time. I served this with fried rice, in the meantime, and ended up sort of stirring it all together like a Korean beef-fried rice.

    Korean Steak
    Serves 4-6

    Marinade:
    1/4 cup shredded Asian pear
    2 pounds thinly sliced steak
    1/4 cup soy sauce
    1/4 cup low-sodium soy sauce
    2 1/2 tablespoons sugar
    2 1/2 tablespoons brown sugar
    2 1/2 tablespoons sesame seeds (I had to leave these out)
    3 scallions, thinly sliced
    2 cloves garlic, minced
    1 teaspoon grated ginger
    5 tablespoons mirin
    1/2 teaspoon sriracha

    Stir-fry:
    2 tablespoons sesame oil
    1 teaspoon vegetable oil
    1 onion, sliced lengthwise

    1. Combine all marinade ingredients in a large zip-top bag. Refrigerate at least 4 hours, but not more than 24 hours.

    2. Before cooking, sprinkle meat with sesame oil.

    3. Heat oil in a wok or large skillet over high heat. Stir-fry onion and beef (discarding the marinade) until beef is no longer pink, about 5-10 minutes.

    Friday, November 25, 2011

    Chicken or Turkey Noodle Soup

    As I'm writing this blog post, the thermometer is showing a whopping 2 degrees F outside, which is, by far, the chilliest it's been thus far this fall. That means ... soup!

    I used this soup using uncooked chicken, but you can easily add leftover cooked chicken or turkey, instead. So this is a great use for some of that Thanksgiving turkey.

    Chicken or Turkey Noodle Soup
    Serves 6

    1 tablespoon olive oil
    2 tablespoons butter
    1 potato, peeled and cubed
    2 carrots, peeled and cubed
    1 medium onion, chopped
    1 bay leaf
    Salt and pepper
    1 1/2 teaspoons poultry seasoning
    2 tablespoons flour
    2 32-ounce cartons chicken broth
    1 pound boneless, skinless chicken, cut in small chunks
    1 12-ounce package frozen homestyle egg noodles
    4 sprigs fresh thyme (or 1 teaspoon dried thyme)
    Additional salt and pepper, to taste

    1. Heat oil and butter in a pot over medium to medium-high heat. Add potato, carrots, onion, and bay leaf, and season with salt and pepper. Cook about 4 minutes, until vegetables start to soften.

    2. Add poultry seasoning and flour to vegetables. Stir until vegetables are coated, and cook about 1 minute.

    3. Stir in chicken broth. Heat until boiling, and then add chicken, noodles, and thyme.

    4. Reduce heat. Cover and simmer 20-30 minutes, or until chicken and noodles are cooked through. Season to taste with salt and pepper, and remove bay leaf and thyme stems before serving.

    Sunday, October 30, 2011

    Slow Cooker Beef and Barley Soup

    I've been a bit under the weather lately, and what better cure for what ails you than a hearty, homemade soup?

    Beef and barley soup is a longtime favorite of mine, although I've never found quite the right formula at home. My attempts have either tasted too strongly of wine, tomatoes, or salty beef broth, rather than a complimentary balance of all three. Enter Slow Cooker: The Best Cookbook Ever by Diane Phillips, which has about the most perfect beef and barley soup broth I've tasted. (This cookbook also gave me my favorite chili recipe.)

    My mom stopped by while I was packing up the leftovers. She thought the soup was so terrific that after one taste, she took me up on my offer to send a few bowls back with her. And rumor has it, she ate it all in one sitting.

    Slow Cooker Beef and Barley Soup
    Makes 10-12 servings

    2-2 1/2 pounds beef, cut in 1/2-inch pieces
    Salt and pepper
    2 tablespoons olive oil
    2 cloves garlic, minced
    1 large onion, chopped
    8 ounces baby portabello mushrooms, stemmed and chopped
    1 1/2 teaspoons dried thyme
    4 carrots, chopped
    3 stalks celery with leaves, chopped
    3 tablespoons tomato paste
    1 cup red wine
    6 cups beef broth (preferably low-sodium)
    1/2 cup pearl barley
    Additional salt and pepper, to taste

    1. Heat oil in a large skillet over medium-high heat.

    2. Add the beef in batches, and season with salt and pepper before browning on all sides before transferring to slow cooker.

    You want to get it a bit more brown than I did here. I nearly started my stovetop on fire shortly before this, so I was playing it safe.

    3. Add the garlic, onions, mushrooms, and thyme to the skillet. Saute until the liquid from the mushrooms has evaporated before transferring to slow cooker.

    4. Deglaze the skillet with the tomato paste and red wine. Allow wine to reduce by about 1/4 cup before transferring to the slow cooker.

    5. Add carrots and celery to slow cooker, and then add broth and barley. Stir to combine.

    6. Cook on low 6-7 hours. Season with salt and pepper before serving.

    Thursday, October 13, 2011

    Hot and Spicy Ramen

    First off, let me just explain that I know I'll be getting flak about this post. Because it's ramen noodles, that easy-cooking staple of poor college students everywhere.

    However, when you go to many a sushi restaurant, you can order a bowl of spicy ramen to accompany your cold sushi, and that's the kind of ramen that I'm talking about here. The noodles are more tender and flavorful, and the hot broth gives you a spicy kick all the way down to your toes.

    So yes, this "recipe" starts with a package of ramen noodles, which cost approximately 29 cents at your local grocery store. But do away with that salty packet and flavor your own broth, and you've got an easy, restaurant-style ramen of your own.

    Hot and Spicy Ramen
    Serves 2

    32 ounces chicken broth
    1 package ramen noodles (seasoning packet discarded)
    3 teaspoons soy sauce
    1/2 teaspoon sriracha or chili oil
    1/2 teaspoon grated ginger
    1 cup cubed, cooked chicken or pork (optional)
    2 scallions, thinly sliced
    Dash of sesame oil


    1. In a medium saucepan, combine broth and noodles. Cover and bring to a boil over high heat, and then stir to break up noodles.

    2. Reduce heat to medium. Add soy sauce, sriracha or chili oil, and ginger. Simmer, uncovered, for 10 minutes.

    3. Stir in a dash of sesame oil and garnish with scallions.

    Tuesday, October 11, 2011

    Oven-Fried Chicken Fingers with Tangy Dipping Sauce

    I've been doing a lot of baking lately to put together some of our families' favorites recipes, and I've been trying to balance out all that decadence with some lighter meals. Luckily, I have a wealth of cookbooks and cooking magazines at my disposal to give me ideas, such as this one from Cuisine at Home.

    This recipe makes some genuinely crispy, oven-baked chicken fingers, and my little brother loved them. Of course, he drenched his with the homemade sauce, which tastes like a sweeter buffalo wing sauce.

    Note that these are a bit time-consuming. Had I read through the recipe thoroughly, my dinner guests wouldn't have been subjected to those two extra episodes of Mickey Mouse Clubhouse while waiting for their food. (Of course, I also doubled the recipe.)

    Oven-Fried Chicken Fingers with Tangy Dipping Sauce
    Makes 4 servings

    Chicken fingers
    3 boneless, skinless chicken breasts (about 1 pound, total)
    3/4 cup flour
    1/2 teaspoon kosher salt
    1/2 teaspoon pepper
    1/2 teaspoon paprika
    1 cup panko bread crumbs
    2 egg whites
    1/2 cup buttermilk
    1/4 teaspoon Tabasco sauce
    3 tablespoons canola oil

    Dipping sauce
    1/4 cup apple juice
    1/4 cup cider vinegar
    1/4 cup ketchup
    1 tablespoon honey
    1 teaspoon Worcestershire sauce
    1/2 teaspoon kosher salt
    1/2 teaspoon pepper
    1/2 teaspoon dry mustard
    Juice of 1/2 lemon
    Pinch of celery seed
    Pinch of crushed red pepper flakes
    1 tablespoon butter

    1. Preheat oven to 450 degrees. Slice each chicken breast in four strips, lengthwise.

    2. Combine flour, 1/2 teaspoon salt, 1/2 teaspoon pepper, and paprika in a dish.

    3. Dredge chicken fingers in the flour mixture and place on a wire rack.

    4. Add panko to remaining flour mixture.

    5. Whip egg whites to soft peaks in a bowl, using a hand mixer. (I tried a whisk, and after a few agonizing minutes, I switched to the mixer.) Whisk in buttermilk and Tabasco.

    6. Dip each floured strip in the egg white mixture, and then in the pank and flour mixture. Return strips to rack.

    7. Heat oil in a large baking sheet for 5 minutes in the oven.

    8. Arrange chicken in a single layer on the hot baking sheet. (This starts crisping up the bottom of the chicken right away, so it doesn't get soggy.) Roast for 10-15 minutes, flip strips over, and roast an additional 10-15 minutes, until chicken is crispy and cooked through.

    9. Meanwhile, simmer all sauce ingredients except butter over medium-low in a saucepan for about 10 minutes. Remove the pan from heat and swirl in the butter. Serve sauce warm with the chicken.

    Sunday, September 4, 2011

    Grandma's Soup

    I apologize for the lag in postings. I had a half-dozen or so recipes ready to post, but then ... well, it's a long story.

    On an unrelated note, if anyone happens to find an SD card that includes not only pics of delicious-looking food, but also my family's vacation photos from Florida, please contact the hubby.

    My mom stopped by the other day, bearing gifts. (Even though we live only two blocks away now, and we see my mother almost every day, she still prefers to bring gifts when she visits. I'm sure the novelty of our close proxemity will wear off soon.) This time, her gift was a Taste of Home cooking magazine ... with a request. "Can you make me some soup like this?"

    The next morning, the little man and I hightailed it up to our local grocery store, where the little man informed everyone we saw that we "got Grandma's soup." ("Got" is his catch-all verb.) We had to make a few ingredient substitutions, and then we added in some other stuff that we thought would be good, and then invited Grandma over for lunch to eat her super-healthy, Italian vegetable soup.

    Grandma's Soup
    Makes 6 servings

    2 ribs celery, diced
    1 medium onion, chopped
    1 medium carrot, chopped
    1 small zucchini, chopped
    2 cloves garlic, minced
    1 Tbsp. olive oil
    2 c. water
    1 15-oz. can cannellini beans, rinsed and drained
    1 14.5-oz. can diced tomatoes, undrained
    1 14.5-oz. can chicken broth, plus 1/2 c.
    1 tsp. dried basil
    1 tsp. dried marjoram
    1 tsp. dried oregano
    1 tsp. dried thyme
    Salt and pepper, to taste
    1 c. small pasta (I used mafalda)
    4 c. torn baby spinach (I used about 1/2 a package of frozen spinach)


    1. In a Dutch oven or soup pot, heat oil over medium heat. Saute celery, onion, carrot, zucchini, and garlic until tender.

    2. Stir in the water, beans, tomatoes, broth, and seasonings.

    And, of course, taste as you go along. Even the ingredients themselves. Jack lets no bean go untasted.

    3. Bring to a boil, and then stir in pasta.

    4. Reduce heat; simmer, uncovered, about 13-15 minutes, or until pasta is tender. Add spinach during the last few minutes of cooking.