Friday, January 20, 2012

Hibachi Chicken and Steak

The hubby and I love eating at Japanese restaurants, and while the hubby always starts off with some spicy sushi, I save my appetite for the hibachi dishes.

That's pretty easy to do when I don't like sushi. You have now witnessed the full extent of my willpower.

It seems like it should be something that's pretty easy to make at home, so we decided to give it a try. This came pretty darn close for us, although it still might be missing something. Maybe some sake? Extra oil? Spatulas flipping through the air and volcanic onions? We'll have to give those a shot.  

Hibachi Chicken and Steak
Serves 4-6

For the chicken:
1 pound boneless, skinless chicken, cut it bite-sized pieces 
Salt and pepper 
1 tablespoon vegetable or canola oil 
1 tablespoon soy sauce 
1 tablespoon butter 
1-2 tablespoons stir-fry or teriyaki sauce (I used a spicy apricot sauce, sort of like General Tso's) 

For the steak:
1 pound sirloin, cut in bite-sized pieces 
Salt, pepper, and Montreal Steak seasoning 
1 tablespoon vegetable or canola oil 
1 tablespoon soy sauce 
1 tablespoon butter 

1. Heat 1 tablespoon oil in a large skillet or wok over medium-high heat.

2. Add chicken, and sprinkle with salt and pepper. Cook until chicken is starting to brown on both sides, about 3-4 minutes.

3. Add 1 tablespoon soy sauce and 1 tablespoon butter. Cook until chicken is cooked through, about 2-4 minutes.


4. Add stir-fry or teriyaki sauce and toss chicken to coat.


5. Meanwhile, heat remaining oil in another skillet or wok over medium-high to high heat. (You can go a little hotter with the sirloin, because you don't have to worry about cooking it all the way through like you do the chicken.)

6. Add sirloin, and sprinkle with salt, pepper, and steak seasoning. Cook until sirloin starts to brown on all sides.


7. Stir in 1 tablespoon soy sauce and 1 tablespoon butter. If you're feeling adventurous, go ahead and toss in some mushrooms.


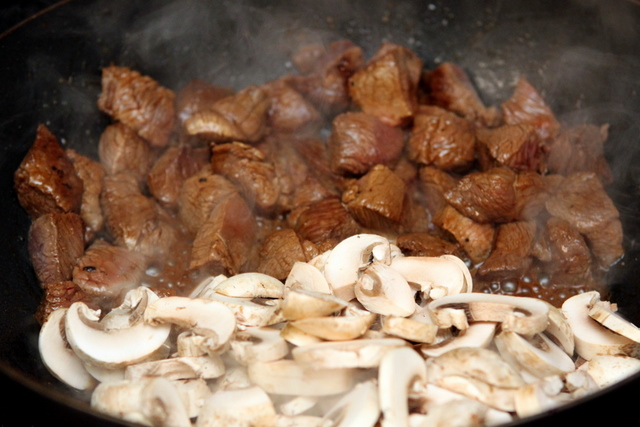
8. Cook until sirloin is cooked through to desired doneness.


Tuesday, January 17, 2012

Broccoli Lo Mein with Chicken or Pork

I love Chinese food, and easy access to it is one thing that I really miss since we moved to our itty-bitty community. Along with pizza delivery, grocery stores that are open past 4 p.m. on Sundays, and my sisters-in-law. Not necessarily in that order.

I've been cooking a lot more Chinese food at home as a result, although much of it still lacks the restaurant-style appeal. (Am I missing the MSG? Should I let it sit under a heat lamp for a few hours?)

I gravitate toward lo meins, especially, because like most toddlers, the little man loves him some noodles. Also, I hate making rice. And macaroni and cheese from a box. And Rice Krispie treats. But we've been through that before.

More so than any lo mein recipe I've tried cooking, this adapted one from America's Test Kitchen tastes more restaurant-style. But fresher and healthier. The sauce is light, yet still flavorful.

I used pork and broccoli in this version, but I can't wait to try this again with chicken, and maybe swap in some other veggies for some of the broccoli.

Broccoli Lo Mein with Chicken or Pork
Serves 4-6

6 ounces dried linguine
2 tablespoons toasted sesame oil
3 tablespoons oyster sauce
3 tablespoons soy sauce
2 teaspoons cornstarch
1/2 cup water, divided
2 tablespoons vegetable oil, divided
1 pound pork loin, cut in 1/4" slices
12 ounces broccoli florets
4 scallions, chopped
2 cloves garlic, minced
Crushed red pepper flakes, for sprinkling

1. Cook linguine according to package directions in salted water, until al dente. Drain and rinse under cold water. Toss with sesame oil.

2. Meanwhile, in a small bowl, combine oyster sauce, soy sauce, cornstarch, and 1/4 cup water. Set aside.

3. Heat 1 tablespoon vegetable oil in a wok or skillet over medium-high to high heat.

4. Turn on your range hood fan and open a few windows. (This is optional, but still recommended.)

5. Add half the pork to the wok and stir-fry until golden, about 2-4 minutes.

6. Transfer pork to a plate and repeat with remaining vegetable oil and pork. Again, transfer pork to a plate.

7. Add broccoli and remaining 1/4 cup water to wok. Cook, covered, until broccoli is just tender and water has evaporated, about 3 minutes.

8. Add scallions and garlic and cook until fragrant, about 1 minute.

9. Return pork to skillet. Add sauce and noodles and toss until well coated. Sprinkle with crushed red pepper flakes, if desired.

Saturday, January 14, 2012

Double-Chocolate Cookies

Jack has developed a taste for Ghirardelli dark chocolate as of late, especially the dark chocolate and caramel squares with sea salt.

He clearly has excellent taste for a 2-year-old. Don't even get me started on how he ate all my $18-per-pound Widman's Chippers over the holidays.

So we decided to make some dark chocolate cookies. With extra chocolate, naturally. They were delicious. And so rich that even I could eat only one at a time.

Double-Chocolate Cookies
Makes about 3 dozen

1 11.5-ounce bag bittersweet chocolate chips
6 tablespoons (3/4 stick) butter
1 cup sugar
3 eggs
1/2 teaspoon baking powder
1/2 teaspoon salt
1 cup flour
1 12-ounce bag semisweet chocolate chips

1. Preheat oven to 350 degrees F.

2. In a small saucepan, melt together bittersweet chips and butter until smooth. Let cool slightly.

3. In a mixing bowl, combine sugar and eggs. Stir in chocolate mixture. Add baking powder, salt, and flour, and mix until well combined. Stir in semisweet chips.

4. Drop cookies into balls on baking sheets and flatten slightly.

5. Bake about 12-14 minutes, until cookies are shiny on the outside, but still soft on the inside.

6. Let sit on baking sheets 2-3 minutes before moving to cooling racks.

Thursday, January 12, 2012

Roasted Cauliflower

This very simple, healthy, not-even-a-recipe recipe is something I made to entice my mother to have supper with us recently.

Yes, I have to shamelessly bribe her with vegetables.

I'm not a huge fan of steamed cauliflower, but when roasted, it takes on a much sweeter and more complex flavor. Needless to say, Mom loved this. I got to try a few bites, and we loaded some on the little man's plate. But the rest of the cauliflower went to Mom.

And when the little man (who eats in sprints) took a quick break from eating and left the room, the cauliflower mysteriously disappeared from his plate before he returned. Hmm ...

Roasted Cauliflower
Serves 2-3, or my mom

1 head cauliflower, cut in florets
2 tablespoons olive oil
3 cloves garlic, minced or pressed
Salt and pepper

1. Preheat oven to 400 degrees F.

2. Toss cauliflower with olive oil and garlic, and place in a baking dish. Sprinkle with salt and pepper.

3. Cover and bake 15 minutes.

4. Remove cover, increase oven temperature to 425 degrees F, and bake another 10-15 minutes until cauliflower starts to crisp up.

Tuesday, January 10, 2012

Beef Noodle Skillet

This is a quick and easy recipe that we threw together after a long afternoon of sledding and snowblowing recently. It's not fancy fare, but it's tasty, filling, economical, and makes a ton of food. (It also reheats pretty well, if you don't cook the bejeezus out of your noodles.)

The idea for this recipe came from Everyday magazine, but as usual, I made some changes to suit our tastes and make it cook faster. (I was hungry.)

Beef Noodle Skillet
Serves 6-8

1 tablespoon olive oil
1/2 onion, chopped
1 pound lean ground beef
Salt, pepper, and onion salt
4 slices bacon, chopped
1 pound red-skinned potatoes, cut in small chunks
1 large bell pepper, cut in small slices
1 15-ounce can tomato sauce
1 cup water
12 ounces dried egg noodles (although you might not use them all)

1. In a large, deep skillet, heat oil over medium-high heat. Add onion and cook until softened, about 3 minutes.

2. Add the ground beef, and sprinkle with salt, pepper, and onion salt. Cook until browned, about 5-7 minutes.

Transfer to a plate or bowl.

3. In the same skillet, cook the bacon over medium-high heat until crisp, about 5-7 minutes. Drain on a paper towel-lined plate.

4. Add the potatoes to the pan and stir to coat with the rendered bacon grease.

5. Cover and cook until tender, about 12-15 minutes.

6. Stir in peppers, hamburger mixture, tomato sauce, and water.

7. Cook until potatoes are tender, about 8-10 minutes.

8. Meanwhile, cook noodles in boiling, salted water until tender, about 8-10 minutes. Drain.

9. Add the noodles to the skillet, starting with about half to two-thirds, and then adding more as needed. Stir well to combine.

10. Before serving, season to taste with salt, pepper, and onion salt.

Saturday, January 7, 2012

Triple-Chip Scone Muffins

Funny thing about this recipe. I'd pulled it out of a magazine years ago (yes, it was my own magazine), and it looked yummy. The little man and I liked the picture, so we decided to make them.

But the recipe was provided by a margarine company, and as a general rule, we don't keep margarine on hand. And to substitute butter just looked like ... a whole lot of butter for a batch of muffins. So we cut the butter in half. And then we changed a few other things, too. Like the amount of sugar. The amount of milk. The amount of chocolate chips. The baking time. So just a few things.

By the time we finished, the only components of the original recipe that remained were the flour and baking powder measurements.

But it worked! These aren't my usual jumbo-sized, gooey dessert muffins. In fact, the texture is much more like a scone than a muffin, and also scone-like in that they're not nearly as sweet as muffins usually are. But I think the lack of sweetness in the dough showcase the chocolate well, (although I'm glad we increased the amount of sugar from the original).

Triple-Chip Scone Muffins
Makes 12 muffins

3 cups flour
2/3 cup sugar
2 tablespoons baking powder
1/2 cup (1 stick) cold butter
1 1/2 cups 2% milk
1/2 cup milk chocolate chips
1/2 cup semisweet chocolate chips
1/2 cup bittersweet chocolate chips

1. Preheat oven to 400 degrees F. Line a muffin tin with cupcake liners.

Jack chose Superman liners. So we could have a "daddy party." (Superman = Daddy and Cupcake liners = Party? Maybe?)

2. Combine flour, sugar, and baking powder in a large bowl. Using a pastry cutter, cut in butter until mixture is crumbly. Stir in milk until just moistened, adding a bit more milk, if necessary.

3. Here's where things get a bit more complicated: The chocolate chips.

3a. First, pour your chocolate chips onto the counter.

3b. Count them.

3c. Sniff them for freshness. Maybe lick a few, for good measure.

3d. Form them into a picture. This was Santa.

3e. Heap your chocolate chips into a measuring cup. Jack likes to round up when it comes to chocolate chips. You know, for good measure. (Ba-dum.)

4. Fold chocolate chips into batter.

5. Spoon mixture evenly into muffin cups.

6. Bake 18-20 minutes, or until brown.

Serving suggestion: Serve in Superman liners with a cup of coffee in your favorite JLA mug.

Thursday, January 5, 2012

Linguine with Shrimp and Scallops

We stayed with my mother-in-law recently, and the hubby likes to make sure that we make plenty of yummy food for her in exchange for taking over her house while we're there.

Also, I usually eat most of the contents of her candy bowl. There, I admitted it.

This is a modified version of a Rachael Ray recipe, which we made because my mother-in-law loves seafood (especially scallops). This dish is sort of like the shrimp scampi that I make for the hubby, but with more lemon and less heat.

Linguine with Shrimp and Scallops
Serves 2-3

8 ounces linguine
1/2 pound shrimp, peeled, deveined, and patted dry
1/2 pound sea scallops, muscle removed, and patted dry
1/2 tablespoon Old Bay seasoning
1 lemon
1/2 stick butter
3 cloves garlic, minced
1/2 teaspoon crushed red pepper flakes
1/2 cup finely chopped fresh flat-leaf parsley
1 tablespoon olive oil
1/4 cup white wine

1. Cook pasta in salted water according to package directions, and reserve 1/2 cup pasta water before draining.

2. Meanwhile, toss shrimp and scallops with Old Bay seasoning and half a lemon, cut in slices. Set aside.

3. Melt butter over low heat and stir in garlic and crushed red pepper flakes. Let bubble gently for 10 minutes.

4. Heat oil in a large skillet over medium-high heat. Add shrimp, scallops, and sliced lemon.

5. Cook 5-6 minutes, turning once, until seafood is opaque and are cooked through. Add wine and the juice of the remaining half of lemon to deglaze the pan.

6. Transfer mixture to a bowl.

7. Stir parsley into garlic butter. Add to seafood mixture.

8. Stir in pasta and the reserved pasta water and toss gently. Let pasta sit for a few minutes until liquid is absorbed by pasta. Add salt and pepper to taste.

Tuesday, January 3, 2012

Sweet and Spicy Meatballs

But first up, a few notes!
  • I received the Liebster Blog award from The Daily Smash, and am very touched and honored. Check out her blog for some incredibly yummy-looking recipes, which have that "I'd actually make that!" appeal. Thanks again! (And I'll have to pass this on, yet, too.)

  • My peanut butter cup shortbread was recently featured on the Bizzy Bakes blog. (Say THAT five times fast.) This, too, is quite the honor -- thank you! Although I keep skipping past my recipe to stare at the cheesecake recipe beneath it. Damn you, New Year's diet!
And now, back to our regularly scheduled programming.

I was looking to make some appetizer meatballs recently, and I decided to try this recipe, which was from Everyday with Rachael Ray magazine.

Now, I liked the glaze. A lot. It definitely has some kick, even when using the lower amount of Tabasco, but it does mellow after it's on the meatballs.

However, the accompanying recipe for meatballs was the weirdest meat mixture I've ever had the displeasure of working with. In addition to three eggs, it also called for 3/4 a cup of broth, which I thought was strange. But hey, we'd try it. The meatballs were so moist that they were nearly impossible to shape or cook. As my friend Sally would say, those meatballs were a pile.

Moral of the story? Use your own favorite meatball recipe, and toss them with the glaze. From now on, I'll use the meatball recipe from my Meatballs in Tomato Sauce.

Sweet and Spicy Meatballs
Makes about 4 dozen

2 pounds ground beef, preferably 85% lean
1/2 cup Italian-seasoned breadcrumbs
1/4 cup grated Parmesan cheese
2 eggs
Salt, pepper, onion salt, and garlic salt
3 tablespoons olive oil (or more, as needed)
1/2 cup chili sauce
1/2 cup peach preserves
1/2-1 tablespoon Tabasco sauce

1. Add the ground beef, breadcrumbs, cheese, and eggs to a bowl. Sprinkle with salt, pepper, onion salt, and garlic salt. Combine mixture thoroughly and form into uniformly sized meatballs.

2. Heat 1 tablespoon oil in pan over medium to medium-high heat. Cook one-third of the meatballs until browned and cooked through. Drain on paper towels. Repeat with remaining oil and meatballs.

3. In a blender, combine chili sauce, peach preserves, and Tabasco. Blend until smooth.

4. Heat sauce mixture in microwave or on the stovetop until hot. Toss with cooked meatballs, and serve immediately.

P.S. These looked saucier in person. Promise.

Sunday, January 1, 2012

Brined Turkey Breast

Brining a turkey has long been on my bucket list, and what better way to ring in the New Year and all its resolutions than by tackling something I've always wanted to try?

Okay, so I actually made this on Christmas Eve. Anyway, I haven't yet tried brining a turkey -- or even eating a brined turkey -- because there really hasn't been much of an opportunity for it. We've only hosted the holidays a few times. We typically need drippings for gravy. You don't want to try it and accidentally screw up the sole main course.

This is a Betty Crocker recipe, and I decided to try with a turkey breast. It's a good introduction to brining because it fits in the fridge and is just easier to handle. Plus, my dad was already planning to bring a ham, so there wasn't a lot at stake. If the turkey was awful, we surely wouldn't starve.

One problem I had was finding a turkey breast that wasn't packed in some sort of salt solution. We don't have access to a lot of fresh turkeys in these parts, so I ended up going with the salt-soaked variety. That made the outside pieces of the meat a bit saltier than I'm used to, but not terribly so. Overall, the turkey was incredibly juicy and was infused with great flavor, even if the skin didn't brown and crisp as much as I'd have preferred.

I wasn't positive if the end result was worth the extra effort, but my mother said it was amazing. She even took home leftovers. And Mom knows best.

Brined Turkey Breast
Makes 8-12 servings

9 cups hot water, plus more to cover turkey breast, if needed
3/4 cup salt
1/2 cup sugar
1 4- to 6-pound bone-in turkey breast, thawed, if frozen
1 onion, cut in eight wedges
2 sprigs fresh rosemary
4 sprigs fresh thyme
3 dried bay leaves
Salt and pepper
6 tablespoons butter, melted
1/4 cup dry white wine

1. The day before, mix water, salt, and sugar in a large container or stockpot. Stir until sugar and salt are dissolved. Add turkey. Cover and refrigerate 12-24 hours.

2. Preheat oven to 325 degrees F.

3. Remove turkey from brine. Rinse it thoroughly and pat it dry before placing in roasting pan.

4. Fill cavity with onion, rosemary, thyme, and bay leaf. If necessary, tie some string around it to keep everything together.

5. Place turkey breast side up and sprinkle with salt and pepper.

6. Combine butter and wine. Soak a 16" square piece of cheesecloth in the butter mixture and drape over the turkey.

7. Bake 90 minutes.

8. Remove cheesecloth from turkey. Remove onion and herbs, but leave them in the pan. Bake 30-60 minutes longer, or until a meat thermometer registers 170 degrees F in the thickest part of the turkey.

9. Let rest before carving.