Saturday, December 22, 2012

Slow-cooked Turkey Breast with Gravy

When it comes to holiday cooking -- or entertaining in general -- I typically find the logistical side of things much more daunting than the actual cooking. Figuring out when to make everything so it's all done at the same time is challenging, but finding space to cook it all can be almost impossible.

This fall, I tested various cooking methods with turkeys in an attempt to get them out of the often. This slow cooker recipe ended up becoming such a favorite that the hubby requested it three times within the span of about six weeks. That's a lot of turkey.

The downsides to this recipe include the fact that this makes a turkey breast, not a whole turkey. And the skin doesn't crisp up, so you lose that wow factor (and the flavor of the toasty skin).

But this recipe is so easy, and the meat is so tender and delicious that I don't even miss the skin, which I shouldn't be eating, anyway. And the drippings make fabulous gravy, which I doctor up using my dad's tried-and-true cream of chicken soup method.


Slow-cooked Turkey Breast with Gravy
Makes 8-10 servings

  • 1 bone-in turkey breast (about 6-7 pounds)
  • 2 tablespoons butter, softened
  • 1/2 teaspoon salt
  • 1/2 teaspoon dried rosemary, crushed
  • 1/2 teaspoon dried thyme
  • 1/4 teaspoon garlic powder
  • 1/4 teaspoon freshly ground pepper
  • 1 14.5-ounce can chicken broth
  • 2 cans condensed cream of chicken soup
  • 1 can water
  • 4 heaping tablespoons cornstarch
  • 1/2 cup water
  • Salt and pepper, to taste
  •  
    1. Put turkey in 6-quart slow cooker. Rub with butter. Combine the salt, rosemary, thyme, garlic powder and pepper; sprinkle over turkey. Pour broth over turkey. Cover and cook on low 5-6 hours, or until tender.
    2. Remove turkey from slow cooker. Cover with foil and set aside.
    3. Pour turkey drippings into a pan on the stove top; skim fat from drippings.
    4. Add cream of chicken soup and 1 can water and combine. Bring gravy to a boil, and then reduce heat to medium. Simmer about 10 minutes.
    5. Combine cornstarch and water. Return gravy to a boil and add cornstarch mixture, whisking constantly. When gravy reduced desired thickness, reduce heat to low. Season to taste with salt and pepper.
    6. Carve turkey and sprinkle with salt and pepper, if desired. Serve with gravy.

    Thursday, December 20, 2012

    Snickerdoodle Bread

    Snickerdoodle cookies are such a holiday favorite of mine that I can't bear to save them just for the holidays, so I was pretty excited to stumble upon this recipe for snickerdoodle bread. The recipe was a cinch and made the house smell heavenly.

    I made four mini loaves and two extra-mini loaves with this recipe, and actually only managed to snag a few slices before the entire stash disappeared. My mother, the main culprit behind the disappearing bread, claimed that it tasted even better after it sat tightly wrapped for a day or two.


    Snickerdoodle Bread
    Makes 5 mini loaves or 2 large loaves

    Bread
    • 2 1/2 cups flour
    • 2 teaspoons baking powder
    • 1 cup butter, softened
    • 2 cups sugar
    • 1/2 teaspoon salt
    • 2 teaspoons cinnamon
    • 3 eggs
    • 2 teaspoons vanilla extract
    • 1 cup sour cream
    • 1 1/2 cups (1 package) cinnamon chips
    • 2 tablespoons flour
    Topping
    • 2 tablesopons sugar
    • 2 teaspoons cinnamon
    1. Preheat oven to 350 degrees F. Grease 5 mini loaf pans (about 5 3/4“ by 3 1/4” by 2 1/4").
    2. In a medium bowl, combine 2 1/2 cups flour and baking powder.
    3. In a separate bowl, use a mixer to cream butter, 2 cups sugar, salt and 2 teaspoons cinnamon until fluffy, about 2 minutes.
    4. Add eggs, one at a time, mixing well after each addition. Add vanilla and sour cream and mix to combine.
    5. Add flour mixture, stirring until just combined.
    6. Coat the cinnamon chips with 2 tablespoons flour and stir into batter.
    7. Spoon batter into pans (don’t fill more than 2/3 full.)
    8. Combine topping ingredients and sprinkle over the top of the batter in the pans.
    9. Bake 35-40 minutes, or until a toothpick inserted in the center of the loaf comes out clean. (If you're making large loaves, increase the baking time to 60-70 minutes.)
    10. Let cool 5 minutes before removing from pans. When fully cool, wrap tightly in plastic wrap to store.
    11.  

    Wednesday, December 19, 2012

    Roasted Autumn Vegetables

    I'm back! Or at least, I hope to be. The short delay I'd intended with my blogging turned into more of an indefinite leave of absence as the hubby and I have been adjusting to our new schedules. As I mentioned many, many moons ago, we bought our local newspaper and now find ourselves working nearly four full-time jobs between the two of us. A few things had to give in the schedule, like blogging. And cleaning.

    But not cooking. In fact, I find myself cooking as much now as I ever have. A big part of that is because I write a weekly food column in the paper, so I'm constantly testing new recipes, or remaking favorites with new, newspaper-friendly photos.

    But I do miss blogging, and I'm hoping to get back to it, although maybe not as often as I did before. And probably with fewer step-by-step photos. And I promised my fellow publishers that I'd put any new recipes in print, first -- although I'm not sure if my column is that hot a commodity!

    I'll start by attempting to backfill some of the recipes I've worked on the past several months, so some of them might seem a bit out of order or out of season. And then once I catch up, hopefully things will get back to normal!

    I'll start with Roasted Autumn Vegetables, which might not sound terribly exciting, but is a healthy and tasty side dish that's especially great around the holiday season. This dish is simple and colorful, and pretty hand-off.


    Notes:
    • Swap in other root vegetables or change the quanitites according to your preferences.
    • If you double the recipe, put the vegetables on two pans and rotate them halfway through the cooking process.
    • Leftovers taste great in soup. Saute some shallot (or a little onion and garlic), add broth, and then add leftover vegetables and cooked tortellini. Season to taste with salt, pepper, and crushed red pepper flakes.
    Roasted Autumn Vegetables
    Makes 6 servings
    • 1/2 pound baby carrots, halved
    • 1 medium red onion, cut in 16 wedges and separated
    • 1 small butternut squash, peeled, seeded and cut in 1-inch chunks
    • 1 large sweet potato or yam, peeled and cut in 1-inch chunks
    • 2 medium Yukon gold potatoes, scrubbed and cut in 1-inch pieces
    • 1 clove garlic, minced
    • 2 tablespoons olive oil
    • 1 teaspoon dried (rubbed) sage
    • 1 teaspoon dried rosemary, crushed
    • 1/2 teaspoon salt
    • 1/4 teaspoon pepper
    1. Preheat oven to 425 degrees F. Spray large jelly roll pan with nonstick cooking spray.
    2. Place vegetables in pan. Pour oil over vegetables. Sprinkle with seasonings and stir to coat.
    3. Bake 35-45 minutes, or until vegetables are tender.

    Sunday, April 29, 2012

    Teriyaki Chicken with Noodles

    When the hubby and I moved to my small hometown, we knew there would be a few trade-offs. At the top of the list are the hubby’s sisters, whom we don’t see as often as we’d like.
    A distant second is running errands when the stores aren’t busy. It’s more difficult now to shop at 9:30 on a Wednesday night so I can actually look at the color of a lipstick before I buy it.
    Lastly, we miss Chinese food delivery.

    We didn’t do delivery frequently, but it was reassuring to know that it was always there. Spring-cleaning and you’re too tired to cook? Chinese! Surprise houseguests and you just got home from work? Chinese! Baby’s been screaming from a roseola-induced fever and you haven’t slept in four nights and it’s Thanksgiving Day? Chinese!
    The hubby and I still need a regular Chinese food fix, so we make our own. This dish is healthy and quick, and you can easily change it up by using pork or beef instead of chicken, or adding different (or more) vegetables.

    If you don't have sake or mirin, white wine or chicken broth are both acceptable substitutes, If you add about ¼ teaspoon of sugar or so to make up for the mirin’s sweetness.
    A mushy noodle does not a happy Alyssa make, so in stir-fries, I use sturdier Chinese egg noodles, udon noodles, or soba noodles. In a pinch, you can use linguine or even ramen noodles.

    Teriyaki Chicken and Noodles
    Serves 3-4
    1 clove garlic, minced
    1½ teaspoons grated fresh ginger
    1/3 cup low-sodium soy sauce
    1 tablespoon sake
    ¼ cup mirin
    1 pound boneless, skinless chicken breast, cut in thin slices

    Dash of salt
    2 tablespoons canola or vegetable oil
    1 teaspoon dark sesame oil
    2 teaspoons sugar
    ½ teaspoons crushed red pepper flakes (optional)
    1 onion, cut in thin wedges
    4 scallions, cut in 1” pieces
    14 ounces fresh noodles, cooked according to package directions (about 9 ounces dried noodles)
    Toasted sesame seeds, for serving


    1. Combine garlic, ginger, soy sauce, sake and mirin in a bowl. Add chicken and toss until coated, and sprinkle with salt. Refrigerate 30 minutes.


    2. Add 1 tablespoon canola oil and ½ teaspoon sesame oil to a wok. Heat over medium-high to high heat. Drain chicken (reserving marinade) and add to pan, stir-frying until chicken is golden and cooked through.


    Remove from pan.

    3. Meanwhile, add reserved marinade to a small saucepan. Add sugar and crushed red pepper flakes. Boil 2 minutes and then reduce heat. Simmer until sauce is slightly syrupy. Remove from heat.

    (Bringing the sauce to a boil is essential to kill off any bacteria from the chicken. For the love of Pete, do not skip this step.)
    4. Add remaining oil to the wok and add onion. Stir-fry 3-4 minutes, or until softened.

    5. Return chicken to the wok. Add scallions and drained noodles, tossing well to combine. Add sauce and cook 1-2 minutes. Sprinkle with sesame seeds before serving.

    Monday, April 23, 2012

    Candy Bar Sundaes

    While baseball season makes some people long for hot dogs, peanuts, and cracker jacks, I crave ice cream. When we were growing up, my family visiting Dairy Queen on every summer shopping trip, just so that we could order sundaes in little plastic baseball caps. My sister and I had a complete collection, but of course, our prized hats were our little Detroit Tigers hat sundae cups.
    I decided to kick off baseball season with some homemade ice cream, which is easier than it looks and totally addictive. (After eating some of this, my mom said that storebought ice cream doesn't even taste good anymore.)
    I used chopped Heath bars in my ice cream, and topped my sundaes with chocolate syrup and homemade salted caramel syrup. I thought they were perfect; the hubby asked for Butterfingers next time. The ice cream is versatile enough for virtually any candy, I think.
    And I apologize for the poorer-than-usual photos. My camera equipment seems to change daily, and some practical joker keeps switching them from automatic to manual focus. Ha!
    Candy Bar Sundaes
    Makes 8 sundaes

    4 large egg yolks3/4 cup sugar
    2 cups heavy cream
    1 cup whole milk
    2 teaspoons vanilla extract
    1 cup chopped candy bars, frozen
    Caramel syrup, recipe follows
    Chocolate syrup, for serving
    1. Beat the egg yolks in a small bowl.

    I like to call this photo Beaten Eggs in Bowl.

    2. Heat the sugar and 1 cup cream in a saucepan over medium heat until cream starts to bubble.

    I call this one Cream That Looked Like It Was Bubbling Through the Manual Focus While I Was Wearing My Reading Glasses, But in Hindsight, Is Not. Unlike most folks', my hindsight is not 20/20.

    3. Pour a little hot cream in the egg yolks and beat quickly. This keeps the eggs from scrambling when you add them to the cream. (If you fear you got some scrambling, anyway, just pour the mixture through a sieve before you chill it.)

    4. Pour the egg mixture into the saucepan with the cream, cooking and stirring constantly until the mixture thickens and coats the back of a spoon. 

    5. Pour the mixture into a bowl and chill for about 20 minutes, and then stir in the remaining cream and the milk and vanilla.

    6. Add the mixture to an ice cream maker, following the manufacturer’s instructions. Stir in the chopped candy bars and freeze until ice cream is of desired consistency. Serve with caramel sauce and chocolate syrup.

    Salted Caramel Syrup
    Makes 1 small jar
    1 cup sugar
    1/4 cup water
    2 teaspoons light corn syrup
    3/4 cup heavy cream
    3 1/2 tablespoons butter
    1 teaspoon crushed sea salt or kosher salt

    1. In a heavy-bottomed saucepan, combine the sugar and water over medium-low heat until the sugar dissolves.

    2. Increase the heat and bring to a boil, without stirring. Boil until the syrup is a deep amber color, about 5-6 minutes.

    3. Carefully whisk in the cream. Return mixture to a bubble and stir constantly about 5 minutes.

    4. Remove from heat and stir in the butter and salt. Transfer the caramel to a jar and cool.

    5. Store in a jar in the refrigerator up to 2 weeks, and reheat before serving.

    Saturday, April 7, 2012

    Cadbury Mini Egg Cookies

    Ham is a staple at any and all of our family's gatherings for Easter. I have 101 uses for leftover ham, but Easter candy is trickier. I could just hang onto it, especially if I clear out the leftover Halloween candy. Or I could put it to good use so that I’m not still sprinkling cupcakes and ice cream with pastel-colored eggs come September.
    Luckily, Easter has my favorite candy of any holiday (and I celebrate many a candy holiday). Cadbury Mini Eggs are one of my ultimate weaknesses, and they’re showcased wonderfully in these cookies.
    Chopping the eggs is an arduous process. You could also put them in a bag and smash them, although you might lose some of the pretty shells. You could also substitute M&Ms, chocolate chips or any other similar candy that you have on hand.
    Now, does anyone have any good recipes for a bunch of half-eaten chocolate bunnies?

    Cadbury Mini Egg Cookies
    Makes about 4 dozen


    ½ cup butter-flavored shortening
    ½ cup butter, softened
    1 cup sugar
    1 cup brown sugar
    2 eggs
    1½ teaspoons vanilla extract
    1 teaspoon baking soda
    1 teaspoon baking powder
    ½ teaspoon salt
    6 tablespoons baking cocoa
    2½ cups flour
    1 10-ounce bag Cadbury Mini Eggs
    ½ cup milk chocolate chips
    1. Preheat oven to 350 degrees F.
    2. Chop Mini Eggs in halves or thirds, or bang on them in a resealable bag until they’re crumbled.

    I feel strongly about preserving the integrity of my Mini Eggs, so I’m a chopper. Although I have to eat every third egg just to keep up my strength.
    3. Cream together the shortening, butter and sugars. Add eggs and vanilla, and combine.
    4. Stir in baking soda, baking powder, salt, and cocoa powder, and then stir in flour. Gently fold in candies and chocolate chips.

    5. Drop heaping teaspoonfuls of dough onto cookie sheets and gently shape the cookies.


    6.
    Bake 8-10 minutes and cool on cooling racks.

    Sunday, March 25, 2012

    Pasta e Fagiole Soup

    My little man’s favorite food is soup (except when it’s cupcakes), and we typically make at least one pot of soup each week. Soups with pasta and beans are tops in his book, and we created this light and flavorful soup a few weeks ago.
    The soup gets a lot of flavor from a lot of sautéing, as you’ll notice in the steps. Add ingredient, sauté. Add ingredient, sauté. Each ingredient cooks separately and releases its own flavor to the pot.
    This process starts with sautéing pancetta. You can easily substitute bacon, although it might be a bit chewier in the soup. You can also substitute chopped ham, or even a half-pound of ground beef or Italian sausage, to make the soup heartier. (You could also omit the meat entirely.)
    A small pasta is preferable in this soup. Ditalini is pretty easy to find, but the little man recommends the slightly larger mezzi tubetti. He also recommends wearing a piece of cooked mezzi tubetti on each of your fingers while you eat.
    And I recommend serving this soup with a swirl of olive oil and freshly grated Parmesan cheese at the end, because they really do give the soup extra taste and richness.
    We both insist that you serve the soup with hot, garlicky breadsticks.
    Jack’s Pasta e Fagioli Makes 6 servings
     
  • 1 tablespoon olive oil
  • 3 ounces pancetta, finely chopped
  • 1 yellow onion, finely chopped
  • 2 cloves garlic, minced
  • 3 ounces tomato paste
  • 2 cans small white beans, rinsed and drained
  • 5 cups chicken broth
  • 2 teaspoons dried Italian seasoning, crushed
  • 1 teaspoon salt
  • 1/4 teaspoon freshly ground black pepper
  • 3/4 cup tubetti or ditalini
  • Additional salt and pepper, to taste
  • Extra-virgin olive oil, for serving
  • Freshly grated Parmesan cheese, for serving

  • 1. In a large pot, heat oil over medium to medium-high heat. Add pancetta and saute until golden and crispy, about 5 minutes.


    2. Add onion and saute until softened and golden, about 5 minutes.


    3. Add garlic and saute about 1 minute.

    4. Add tomato paste. Saute about 2-3 minutes, or until tomato paste starts to turn a rusty color.


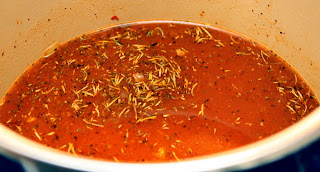
    5. Add beans, broth, Italian seasoning, salt, and pepper. Bring to a boil. Reduce heat and simmer 10 minutes.


    6. Add pasta and increase heat to medium. Cover and cook until pasta is tender, about 8 minutes. Season to taste with salt and pepper.

    7. Serve in bowls. Drizzle with extra-virgin olive oil and Parmesan.

    Wednesday, February 22, 2012

    Whew!

    My apologies for not posting in a few weeks. We sorta kinda bought a newspaper. (And hey, I get a cooking column!) We'll be back to our regularly scheduled programming soon.

    P.S. Cooking is much more fun than bookkeeping. Just FYI.

    Monday, February 6, 2012

    Bakery-Style Icing

    I have a toddler flashcard app on my awesome Windows Phone 7, and my little man is just slightly obsessed with it. He flips through those flashcards as fast as his little fingers can move, in search of one flashcard in particular: Cupcake.

    This particular picture of a cupcake is heaped with swirly frosting and has a smattering of sprinkles, and Jack thinks this is the most beautiful cupcake ever.

    And then he obsesses about cupcakes, and is shocked to find that we don't regularly keep them in stock around here. We're clearly awful parents.

    While shopping recently, the J-man found some Valentine's cupcake liners AND some sprinkles, so I promised him we'd make really pretty cupcakes. Prettier even than the picture on that flashcard.

    And we did.

    Bakery-Style Icing
    Makes enough icing for about 18 cupcakes

    1 cup shortening (I used butter-flavored)
    1 1/2 teaspoons vanilla extract (I used clear so I didn't tint my icing)
    1/2 teaspoon almond extract
    4 1/2 cups powdered sugar
    4-5 tablespoons milk or half and half

    1. In a large mixing bowl, combine shortening, vanilla extract, and almond extract. Beat with a mixer on medium speed until fluffy, about 30 seconds.

    2. Stir in half the powdered sugar and 2 tablespoons milk or half and half. Beat with a mixer until well combined and fluffy. Stir in remaining powdered sugar and 2-3 tablespoons milk or half and half, until icing has desired consistency.

    3. Use as desired. I used a large star tip to pipe the icing onto the cupcakes.

    Thursday, February 2, 2012

    Low-Fat Lemon Pound Cake

    My apologies for the lapse in posts these days. To say there's a lot going on would be an understatement. And when I'm stressed, I take comfort in food. Especially sweet food.

    But hey, at least this one is lower in fat!

    This is a Cook's Country recipe that hits just the right citrusy note without being too overpowering with the lemon. And while it's not quite as moist as its full-fat relation, it's nothing that a small dollop of fat-free Cool Whip can't fix.
    Low-Fat Lemon Pound Cake
    Serves 8-10

    For the cake:
    1 1/2 cups flour
    1/2 teaspoon baking powder
    1/4 teaspoon salt
    1/3 cup light or low-fat sour cream
    1 1/2 tablespoons grated lemon zest
    1 1/2 tablespoons freshly squeezed lemon juice
    1/2 teaspoon vanilla extract
    1 cup sugar
    5 tablespoons butter, softened
    1 tablespoon shortening
    3 eggs, at room temperature

    For the glaze:
    2 tablespoons powdered sugar
    1 teaspoon lemon juice

    1. Unload your dishwasher. This is one of those 5-bowl recipes, and you'll appreciate the head start.

    2. Preheat oven to 300 degrees F, and make sure that the oven rack is positioned in the middle so the cake bakes evenly. Grease and flour an 8 1/2" x 4 1/2" loaf pan.

    3. In a small bowl, combine the flour, baking powder, and salt.


    4. In another small bowl, whisk together the sour cream, lemon juice, and vanilla.


    5. In yet another small bowl, combine the sugar and lemon zest.


    6. Using an electric mixer, beat butter, shortening, and the sugar mixture about 2 minutes. Add eggs, one at a time, and mix until combined.

    7. Reduce mixer speed to low, and add one-third of the flour mixture, followed by half the sour cream mixture. Repeat, and then add the last of the flour mixture. Mix on low until smooth, for about 30 seconds.

    8. Pour batter into loaf pan and tap pan against the counter several times.


    9. Bake until cake is golden brown and a toothpick comes out clean, about 60-70 minutes. Cool cake in pan for 10 minutes, then remove from pack and cool on rack for a few hours.


    10. When the cake is cool, combine powdered sugar and lemon juice in a bowl until smooth. Pour glaze over cake and let set 10 minutes before serving. (I actually think it tastes better if it's refrigerated before serving.)


    Friday, January 20, 2012

    Hibachi Chicken and Steak

    The hubby and I love eating at Japanese restaurants, and while the hubby always starts off with some spicy sushi, I save my appetite for the hibachi dishes.

    That's pretty easy to do when I don't like sushi. You have now witnessed the full extent of my willpower.

    It seems like it should be something that's pretty easy to make at home, so we decided to give it a try. This came pretty darn close for us, although it still might be missing something. Maybe some sake? Extra oil? Spatulas flipping through the air and volcanic onions? We'll have to give those a shot.  

    Hibachi Chicken and Steak
    Serves 4-6

    For the chicken:
    1 pound boneless, skinless chicken, cut it bite-sized pieces 
    Salt and pepper 
    1 tablespoon vegetable or canola oil 
    1 tablespoon soy sauce 
    1 tablespoon butter 
    1-2 tablespoons stir-fry or teriyaki sauce (I used a spicy apricot sauce, sort of like General Tso's) 

    For the steak:
    1 pound sirloin, cut in bite-sized pieces 
    Salt, pepper, and Montreal Steak seasoning 
    1 tablespoon vegetable or canola oil 
    1 tablespoon soy sauce 
    1 tablespoon butter 

    1. Heat 1 tablespoon oil in a large skillet or wok over medium-high heat.

    2. Add chicken, and sprinkle with salt and pepper. Cook until chicken is starting to brown on both sides, about 3-4 minutes.

    3. Add 1 tablespoon soy sauce and 1 tablespoon butter. Cook until chicken is cooked through, about 2-4 minutes.


    4. Add stir-fry or teriyaki sauce and toss chicken to coat.


    5. Meanwhile, heat remaining oil in another skillet or wok over medium-high to high heat. (You can go a little hotter with the sirloin, because you don't have to worry about cooking it all the way through like you do the chicken.)

    6. Add sirloin, and sprinkle with salt, pepper, and steak seasoning. Cook until sirloin starts to brown on all sides.


    7. Stir in 1 tablespoon soy sauce and 1 tablespoon butter. If you're feeling adventurous, go ahead and toss in some mushrooms.


    8. Cook until sirloin is cooked through to desired doneness.


    Tuesday, January 17, 2012

    Broccoli Lo Mein with Chicken or Pork

    I love Chinese food, and easy access to it is one thing that I really miss since we moved to our itty-bitty community. Along with pizza delivery, grocery stores that are open past 4 p.m. on Sundays, and my sisters-in-law. Not necessarily in that order.

    I've been cooking a lot more Chinese food at home as a result, although much of it still lacks the restaurant-style appeal. (Am I missing the MSG? Should I let it sit under a heat lamp for a few hours?)

    I gravitate toward lo meins, especially, because like most toddlers, the little man loves him some noodles. Also, I hate making rice. And macaroni and cheese from a box. And Rice Krispie treats. But we've been through that before.

    More so than any lo mein recipe I've tried cooking, this adapted one from America's Test Kitchen tastes more restaurant-style. But fresher and healthier. The sauce is light, yet still flavorful.

    I used pork and broccoli in this version, but I can't wait to try this again with chicken, and maybe swap in some other veggies for some of the broccoli.

    Broccoli Lo Mein with Chicken or Pork
    Serves 4-6

    6 ounces dried linguine
    2 tablespoons toasted sesame oil
    3 tablespoons oyster sauce
    3 tablespoons soy sauce
    2 teaspoons cornstarch
    1/2 cup water, divided
    2 tablespoons vegetable oil, divided
    1 pound pork loin, cut in 1/4" slices
    12 ounces broccoli florets
    4 scallions, chopped
    2 cloves garlic, minced
    Crushed red pepper flakes, for sprinkling

    1. Cook linguine according to package directions in salted water, until al dente. Drain and rinse under cold water. Toss with sesame oil.

    2. Meanwhile, in a small bowl, combine oyster sauce, soy sauce, cornstarch, and 1/4 cup water. Set aside.

    3. Heat 1 tablespoon vegetable oil in a wok or skillet over medium-high to high heat.

    4. Turn on your range hood fan and open a few windows. (This is optional, but still recommended.)

    5. Add half the pork to the wok and stir-fry until golden, about 2-4 minutes.

    6. Transfer pork to a plate and repeat with remaining vegetable oil and pork. Again, transfer pork to a plate.

    7. Add broccoli and remaining 1/4 cup water to wok. Cook, covered, until broccoli is just tender and water has evaporated, about 3 minutes.

    8. Add scallions and garlic and cook until fragrant, about 1 minute.

    9. Return pork to skillet. Add sauce and noodles and toss until well coated. Sprinkle with crushed red pepper flakes, if desired.

    Saturday, January 14, 2012

    Double-Chocolate Cookies

    Jack has developed a taste for Ghirardelli dark chocolate as of late, especially the dark chocolate and caramel squares with sea salt.

    He clearly has excellent taste for a 2-year-old. Don't even get me started on how he ate all my $18-per-pound Widman's Chippers over the holidays.

    So we decided to make some dark chocolate cookies. With extra chocolate, naturally. They were delicious. And so rich that even I could eat only one at a time.

    Double-Chocolate Cookies
    Makes about 3 dozen

    1 11.5-ounce bag bittersweet chocolate chips
    6 tablespoons (3/4 stick) butter
    1 cup sugar
    3 eggs
    1/2 teaspoon baking powder
    1/2 teaspoon salt
    1 cup flour
    1 12-ounce bag semisweet chocolate chips

    1. Preheat oven to 350 degrees F.

    2. In a small saucepan, melt together bittersweet chips and butter until smooth. Let cool slightly.

    3. In a mixing bowl, combine sugar and eggs. Stir in chocolate mixture. Add baking powder, salt, and flour, and mix until well combined. Stir in semisweet chips.

    4. Drop cookies into balls on baking sheets and flatten slightly.

    5. Bake about 12-14 minutes, until cookies are shiny on the outside, but still soft on the inside.

    6. Let sit on baking sheets 2-3 minutes before moving to cooling racks.

    Thursday, January 12, 2012

    Roasted Cauliflower

    This very simple, healthy, not-even-a-recipe recipe is something I made to entice my mother to have supper with us recently.

    Yes, I have to shamelessly bribe her with vegetables.

    I'm not a huge fan of steamed cauliflower, but when roasted, it takes on a much sweeter and more complex flavor. Needless to say, Mom loved this. I got to try a few bites, and we loaded some on the little man's plate. But the rest of the cauliflower went to Mom.

    And when the little man (who eats in sprints) took a quick break from eating and left the room, the cauliflower mysteriously disappeared from his plate before he returned. Hmm ...

    Roasted Cauliflower
    Serves 2-3, or my mom

    1 head cauliflower, cut in florets
    2 tablespoons olive oil
    3 cloves garlic, minced or pressed
    Salt and pepper

    1. Preheat oven to 400 degrees F.

    2. Toss cauliflower with olive oil and garlic, and place in a baking dish. Sprinkle with salt and pepper.

    3. Cover and bake 15 minutes.

    4. Remove cover, increase oven temperature to 425 degrees F, and bake another 10-15 minutes until cauliflower starts to crisp up.

    Tuesday, January 10, 2012

    Beef Noodle Skillet

    This is a quick and easy recipe that we threw together after a long afternoon of sledding and snowblowing recently. It's not fancy fare, but it's tasty, filling, economical, and makes a ton of food. (It also reheats pretty well, if you don't cook the bejeezus out of your noodles.)

    The idea for this recipe came from Everyday magazine, but as usual, I made some changes to suit our tastes and make it cook faster. (I was hungry.)

    Beef Noodle Skillet
    Serves 6-8

    1 tablespoon olive oil
    1/2 onion, chopped
    1 pound lean ground beef
    Salt, pepper, and onion salt
    4 slices bacon, chopped
    1 pound red-skinned potatoes, cut in small chunks
    1 large bell pepper, cut in small slices
    1 15-ounce can tomato sauce
    1 cup water
    12 ounces dried egg noodles (although you might not use them all)

    1. In a large, deep skillet, heat oil over medium-high heat. Add onion and cook until softened, about 3 minutes.

    2. Add the ground beef, and sprinkle with salt, pepper, and onion salt. Cook until browned, about 5-7 minutes.

    Transfer to a plate or bowl.

    3. In the same skillet, cook the bacon over medium-high heat until crisp, about 5-7 minutes. Drain on a paper towel-lined plate.

    4. Add the potatoes to the pan and stir to coat with the rendered bacon grease.

    5. Cover and cook until tender, about 12-15 minutes.

    6. Stir in peppers, hamburger mixture, tomato sauce, and water.

    7. Cook until potatoes are tender, about 8-10 minutes.

    8. Meanwhile, cook noodles in boiling, salted water until tender, about 8-10 minutes. Drain.

    9. Add the noodles to the skillet, starting with about half to two-thirds, and then adding more as needed. Stir well to combine.

    10. Before serving, season to taste with salt, pepper, and onion salt.